Introduction
If you have followed along with this series on Google authentication with ASP.NET Core, you may have noticed that the example applications we created do not use any sort of local storage for user accounts. We authenticate the user via Google and then add their name, email address, and photo as claims. When we display the user’s information on the page, we retrieve that information from the claims.
This works fine for the currently logged-in user, but what happens when we want to display details for another user?
To understand why this is a problem, let’s look at an example application.
Our example Task list application
Our example is a simple shared Task list application. Once a user logs in, they can add a task and view the tasks added by themselves as well as other users. The EF Core configuration for this is as follows:
public class Task{ public int Id { get; set; }
public required string Description { get; set; }
public bool IsCompleted { get; set; }
public required string CreatedByUserId { get; set; }}
public class ApplicationDbContext(DbContextOptions options) : DbContext(options){ public DbSet<Task> Tasks { get; set; }}Running the application, we can see the tasks listed as well as the user that created the task. For the user, however, we only have the user’s ID - which is their unique Google user ID.
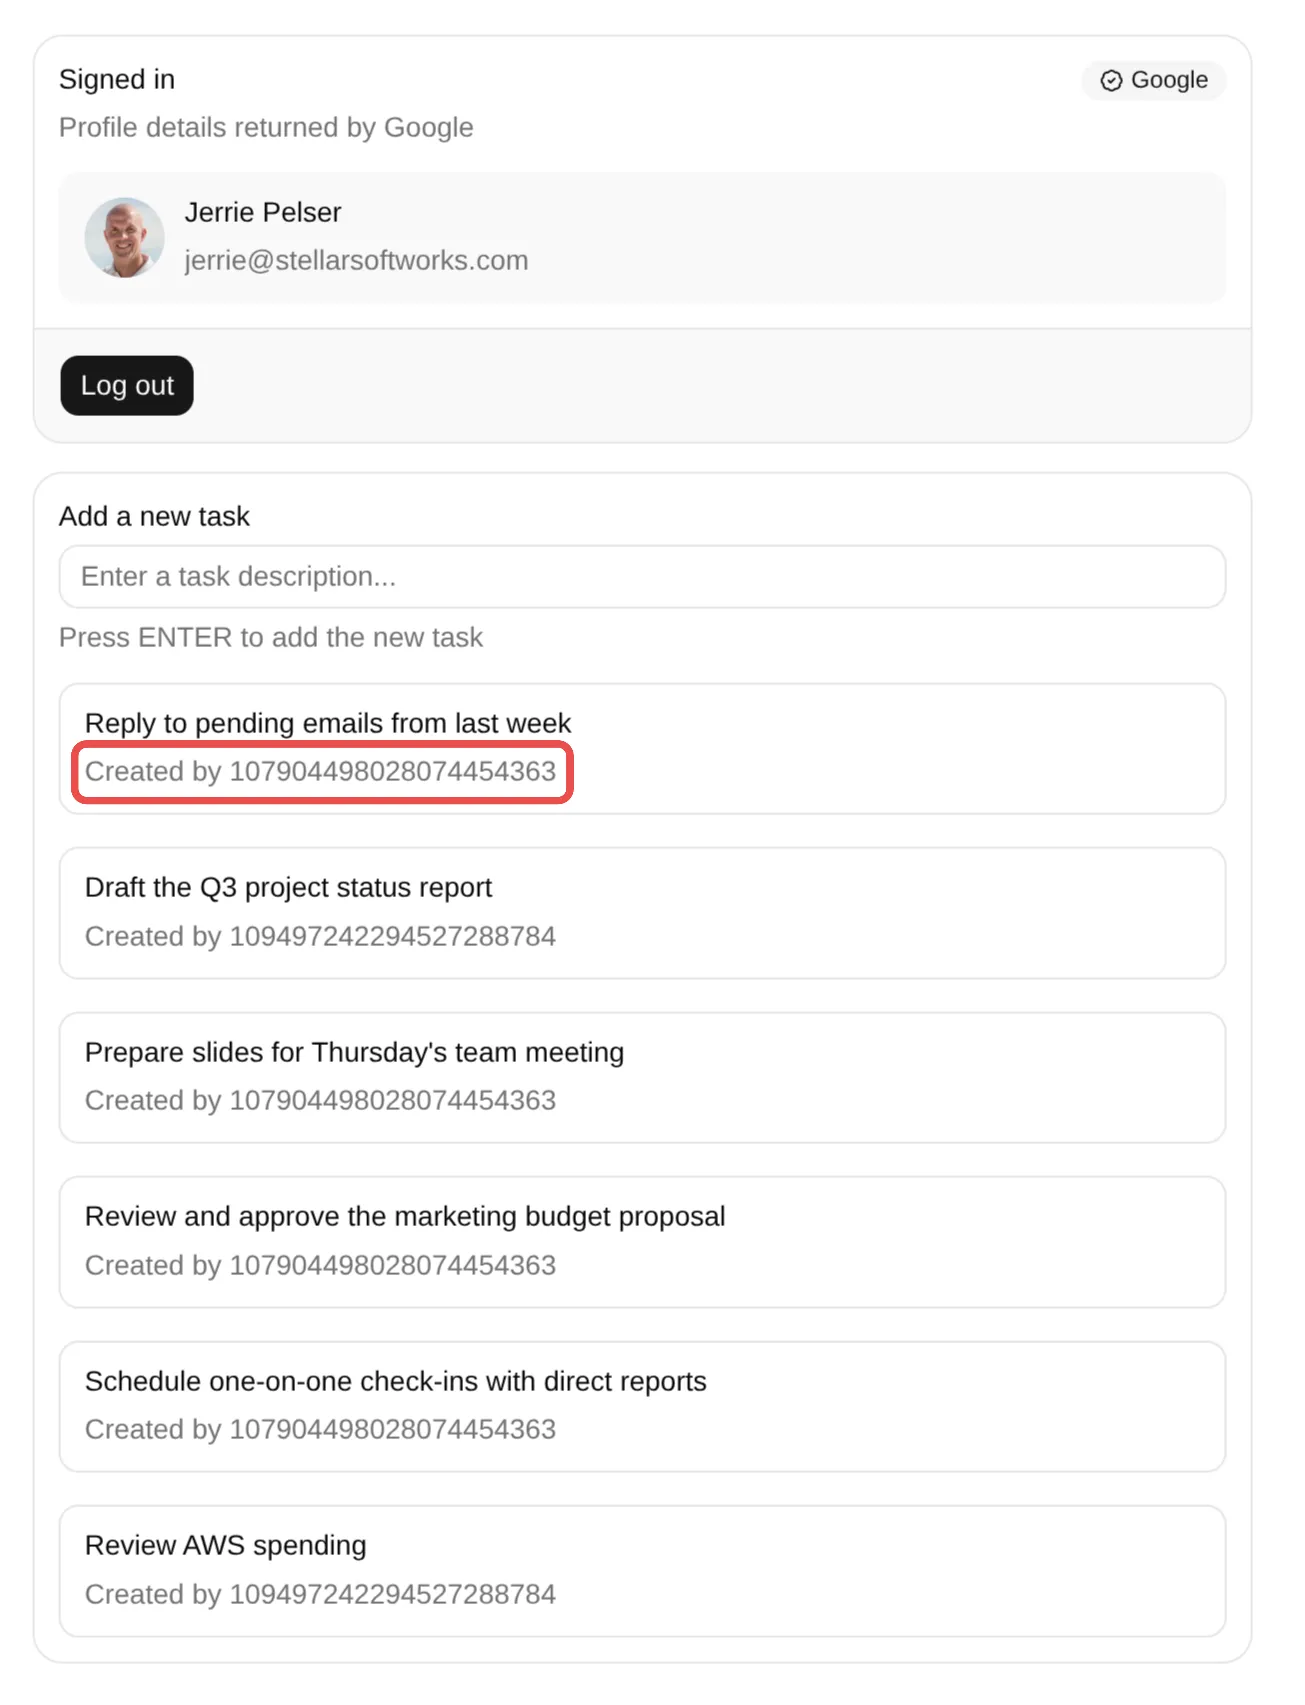
If we want to display the user’s name, we would need to make an API call to the Google People API to retrieve the user’s information. It is ridiculous to think we need to make an API call to Google each time we want to display a user’s information anywhere in our application.
We already have the user’s information when they log in which we store in claims. All we need to do is to persist that information to the database so we can easily read it at a later point in time.
Updating the data model to add user support
For storing the user’s information, we can define a simple User class with the user’s Id and Name.
public class User{ public required string Id { get; set; }
public required string Name { get; set; }}We’ll also update the existing Task class to reference the user.
public class Task{ // ...code omitted for brevity
public required string CreatedByUserId { get; set; }
public User CreatedBy { get; set; }}And update our database context configuration.
public class ApplicationDbContext(DbContextOptions options) : DbContext(options){ public DbSet<Task> Tasks { get; set; }
public DbSet<User> Users { get; set; }
protected override void OnModelCreating(ModelBuilder modelBuilder) { base.OnModelCreating(modelBuilder);
modelBuilder.Entity<Task>(builder => { builder.HasOne(e => e.CreatedBy).WithMany().HasForeignKey(e => e.CreatedByUserId); });
modelBuilder.Entity<User>(builder => { builder.HasKey(e => e.Id);
builder.Property(e => e.Id).HasMaxLength(50); builder.Property(e => e.Name).HasMaxLength(200); }); }}We also make sure to create and run database migrations.
Storing the user’s information
With the database context updated to support a User entity, let’s turn our attention to storing the user information. Same as we did in the blog post about Restricting Google logins based on the user’s domain, we will once again turn to the OIDC authentication handler’s OnTicketReceived event.
builder .Services.AddAuthentication(options => { // ...code omitted for brevity }) .AddCookie() .AddGoogleOpenIdConnect(options => { // ...code omitted for brevity
options.Events = new OpenIdConnectEvents { OnTicketReceived = async context => { var userId = context.Principal!.FindFirstValue(ClaimTypes.NameIdentifier)!; var userName = context.Principal!.FindFirstValue("name")!;
var dbContext = context.HttpContext.RequestServices.GetRequiredService<ApplicationDbContext>(); var user = await dbContext.Users.FindAsync(userId);
if (user != null) { user.Name = userName; } else { user = new User { Id = userId, Name = userName }; await dbContext.Users.AddAsync(user); }
await dbContext.SaveChangesAsync(); }, }; });The code does a check to see whether a user with the given ID already exists in the database. If so, we update their information. If not, we add a new user to the database.
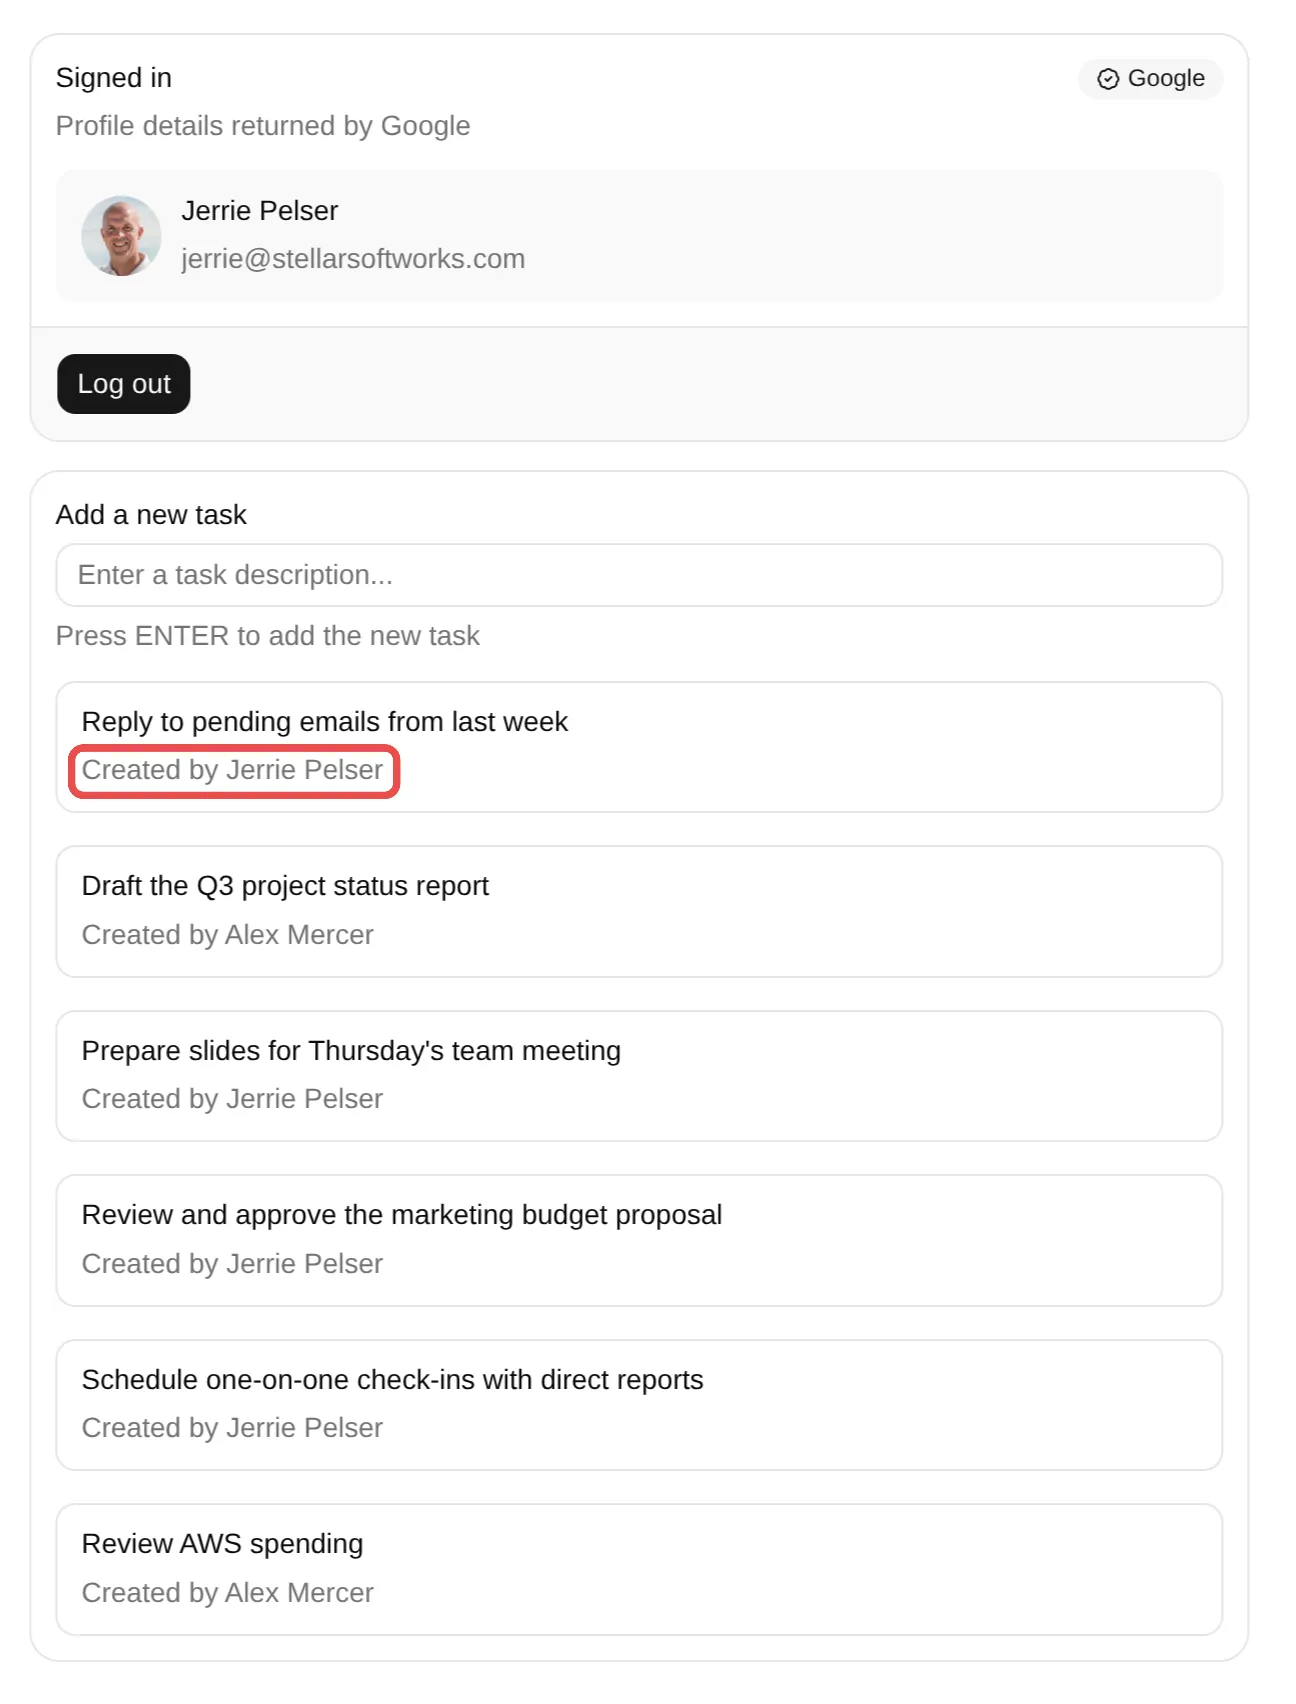
We can also update the code that retrieves the tasks and maps it to the task view models, to include the user’s name rather than just their ID. Then, when we run the application again, we can see the user’s name displayed in the user interface.
Conclusion
In this blog post I demonstrated how you can create a local user record in your database for users logging in via Google. This helps with fast lookups of user information, as well as enforcing referential integrity.
BTW, this will be an issue whenever you delegate user authentication to some sort of 3rd party via OAuth or OIDC - whether that is social providers like Google and Facebook, or Identity and Access Management (IAM) platforms such as Auth0, Clerk, and others.
Full sample code can be found at https://github.com/jerriepelser-blog/google-authentication/tree/master/create-user-record.