Introduction
In the previous two blog posts, I covered basic authentication with Google in ASP.NET Core, as well as restricting logins to users from specific domains. In this blog post I want to talk about assigning and creating test users.
We’ll be looking at two different aspects regarding test users. The first is assigning test users to your OAuth application, allowing external users to use your application while you are still in testing. The second aspect is creating free Google accounts with Google Cloud Identity.
Assign test users to your app
Assigning test users is only relevant if you are creating an external application. If you read the previous blog post, you may recall that I mentioned you can make an OAuth application internal to prevent users outside of your Google Workspace account from logging in.
As opposed to an internal application, an external application allows anyone with a Google account to log in to your application - unless, of course, you add your own restrictions inside the application, as we did in the previous blog post.
All external applications has to go through a verification process before users can access your application. Prior to the application being verified, it will be displayed as “Testing”.
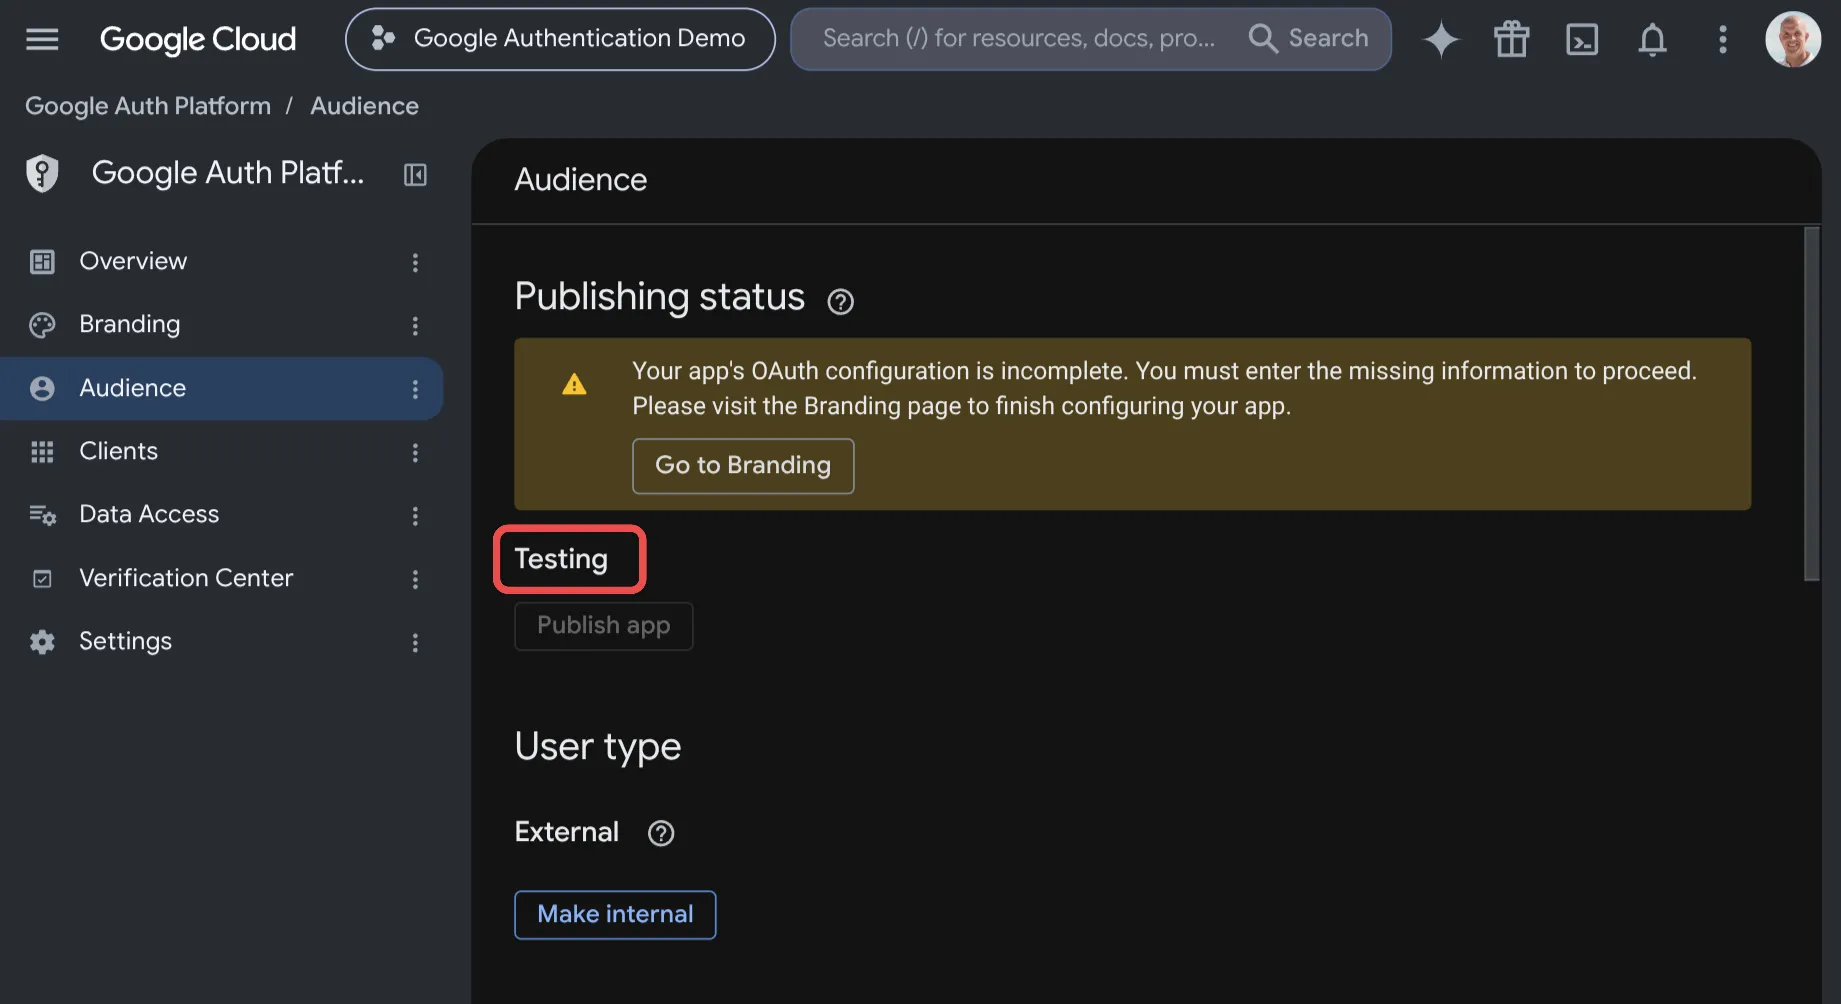
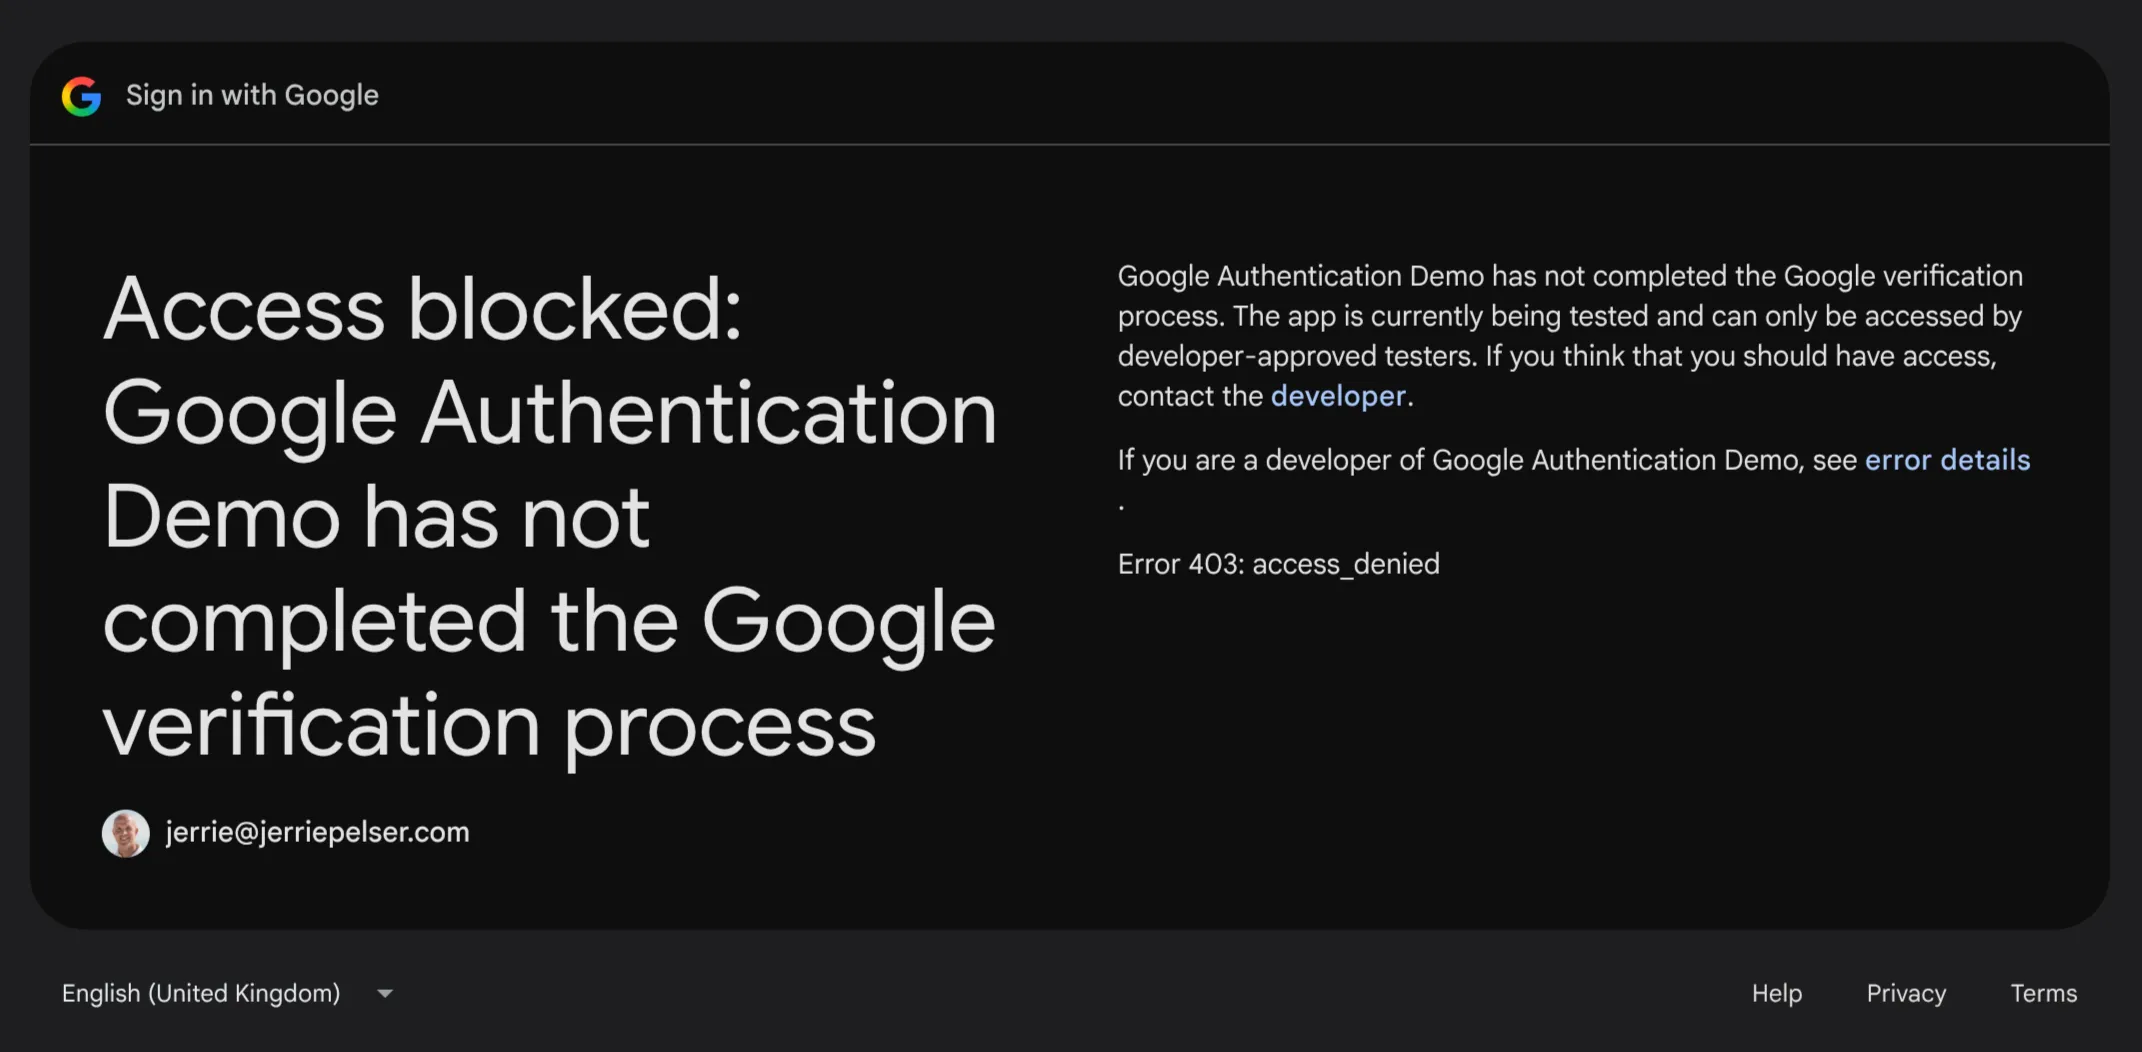
During this phase, anyone can access the application as long as the application only requests basic identity scopes (openid, email, profile). However, if the application requests any scopes beyond those basic identity scopes, the user will be shown an error message when they attempt to log in. Only the OAuth project owner will be allowed to log in.
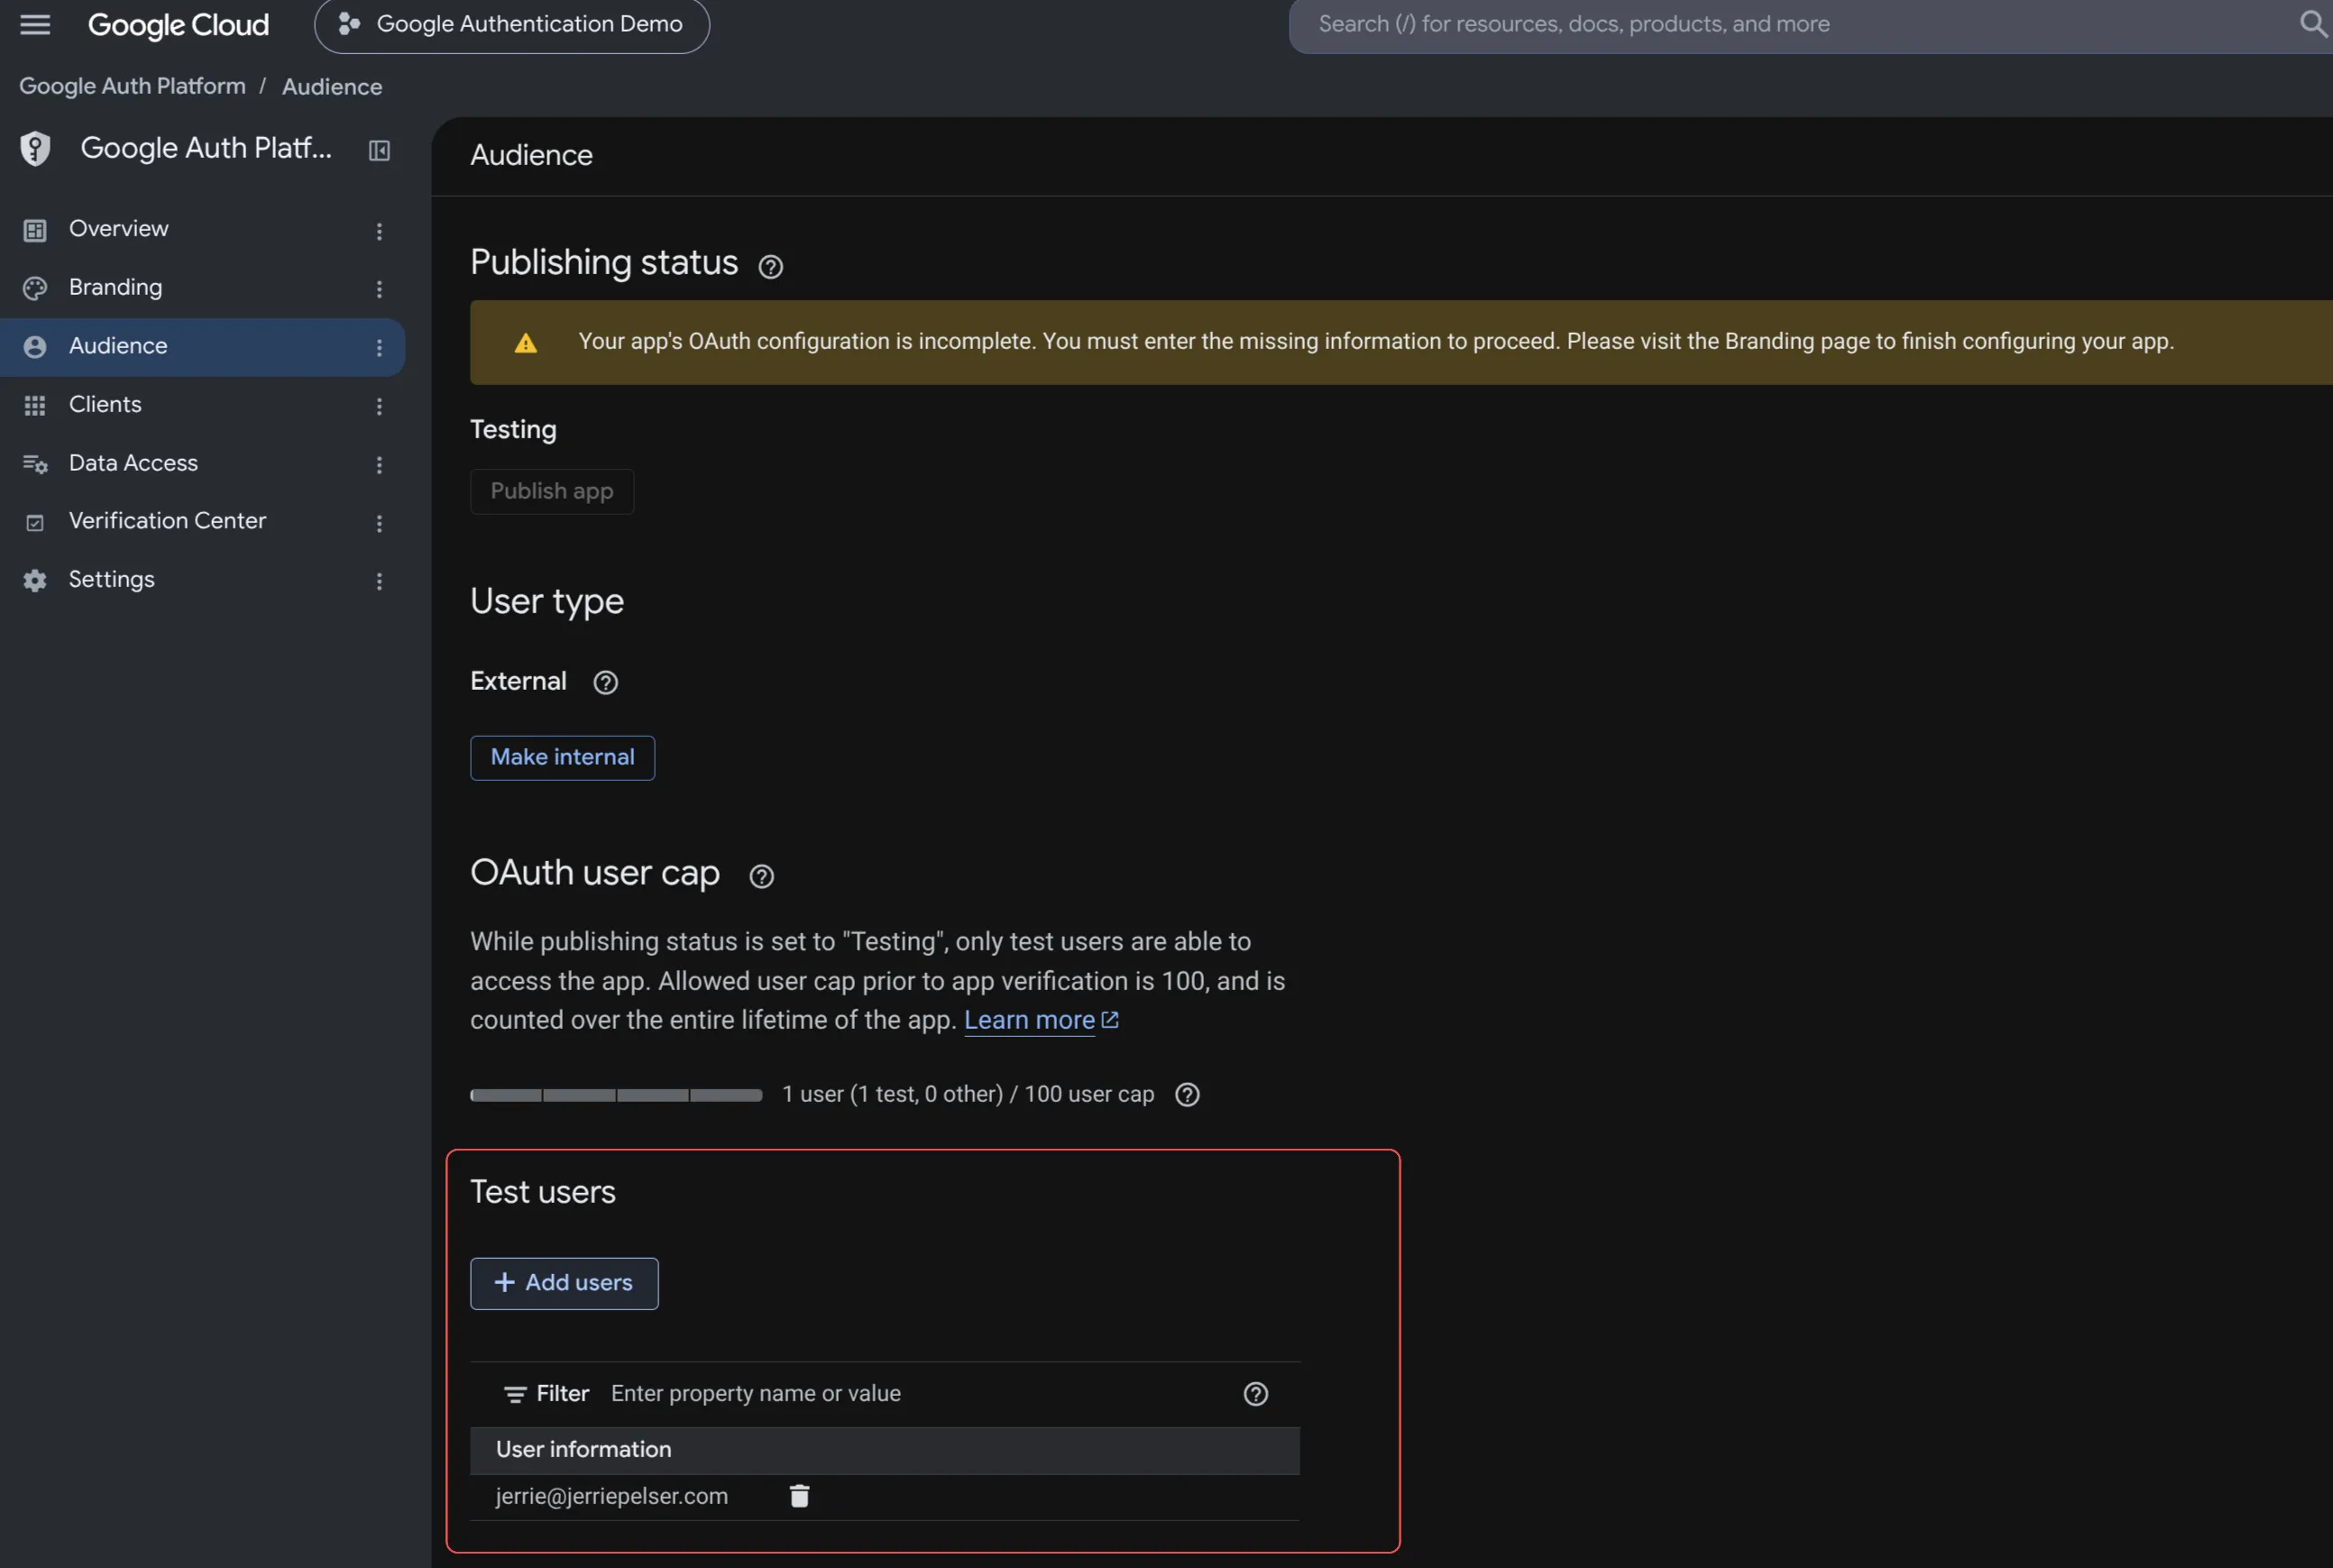
There is a way around this, and that is to assign test users to your OAuth application. You can add up to 100 test users by going to the Audience section of your OAuth application configuration and clicking the Add users button. After adding the test users you will see them listed under the Test users section.
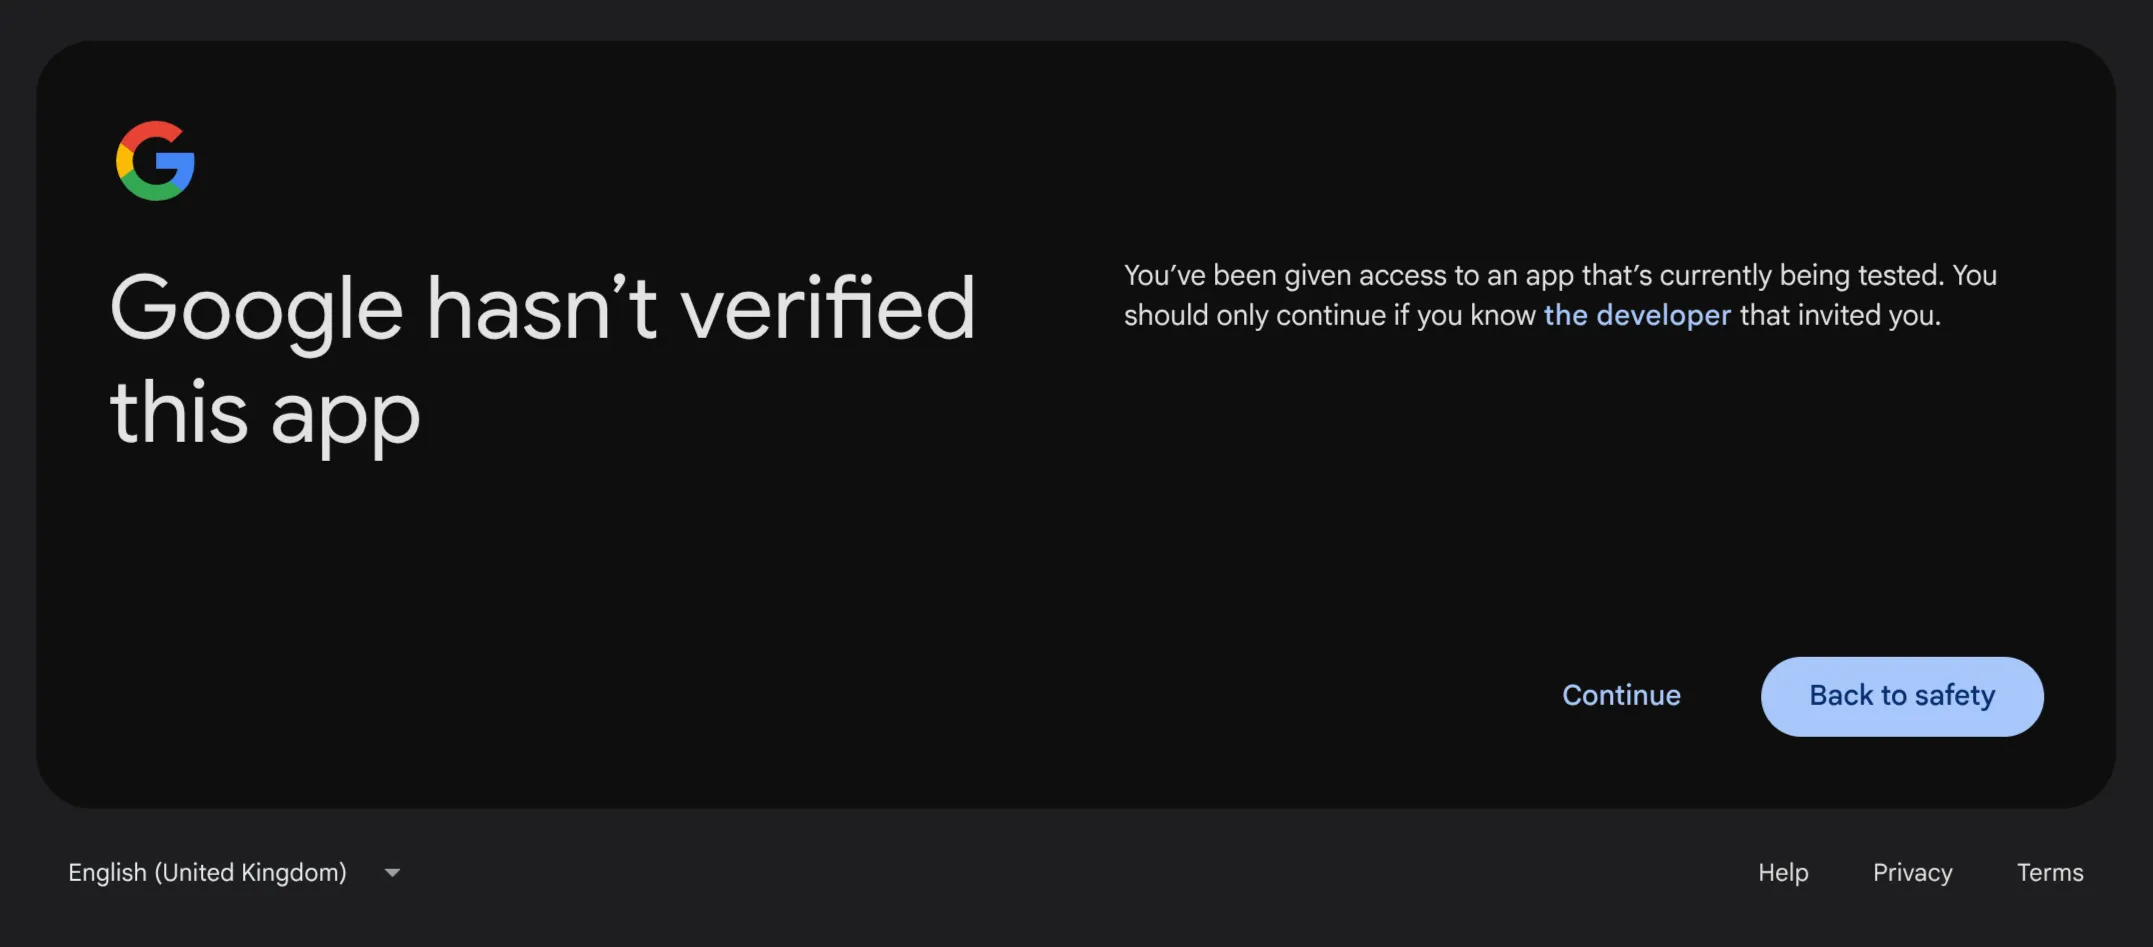
Test users will be able to log in to your application, but they will still be presented with an warning every time they log in.
Using Cloud Identity to create users
Once you start testing your application, you will likely need test accounts to test the behaviour of the application for different users. You could create multiple GMail accounts, but you will likely run into issues as Google’s automated systems may pick up on this and block you.
You may also consider creating additional test accounts in your Google Workspace account - especially if your app is limited to managed accounts like we discussed in the previous blog post, or if you want to test behaviour across multiple managed domains.
The problem with creating additional Google Workspace accounts is that each account will cost you money.
There is, however, a legitimate way to do this without having to pay extra money, and that is by using Google’s Cloud Identity offering. Cloud Identity is a standalone Identity-as-a-service product that allows you to manage user accounts. You can sign up for it separately or add to your existing Workspace account.
What makes Cloud Identity a compelling solution for creating test users for authentication is that it behaves, for all intents and purposes, like a normal Google Workspace account. The difference is that it does not include access to Workspace products like GMail, Calendar, Drive (including Docs, Sheets, Slides, etc), Meet, and Chat. So if your application need access to those APIs, Cloud Identity may not work.
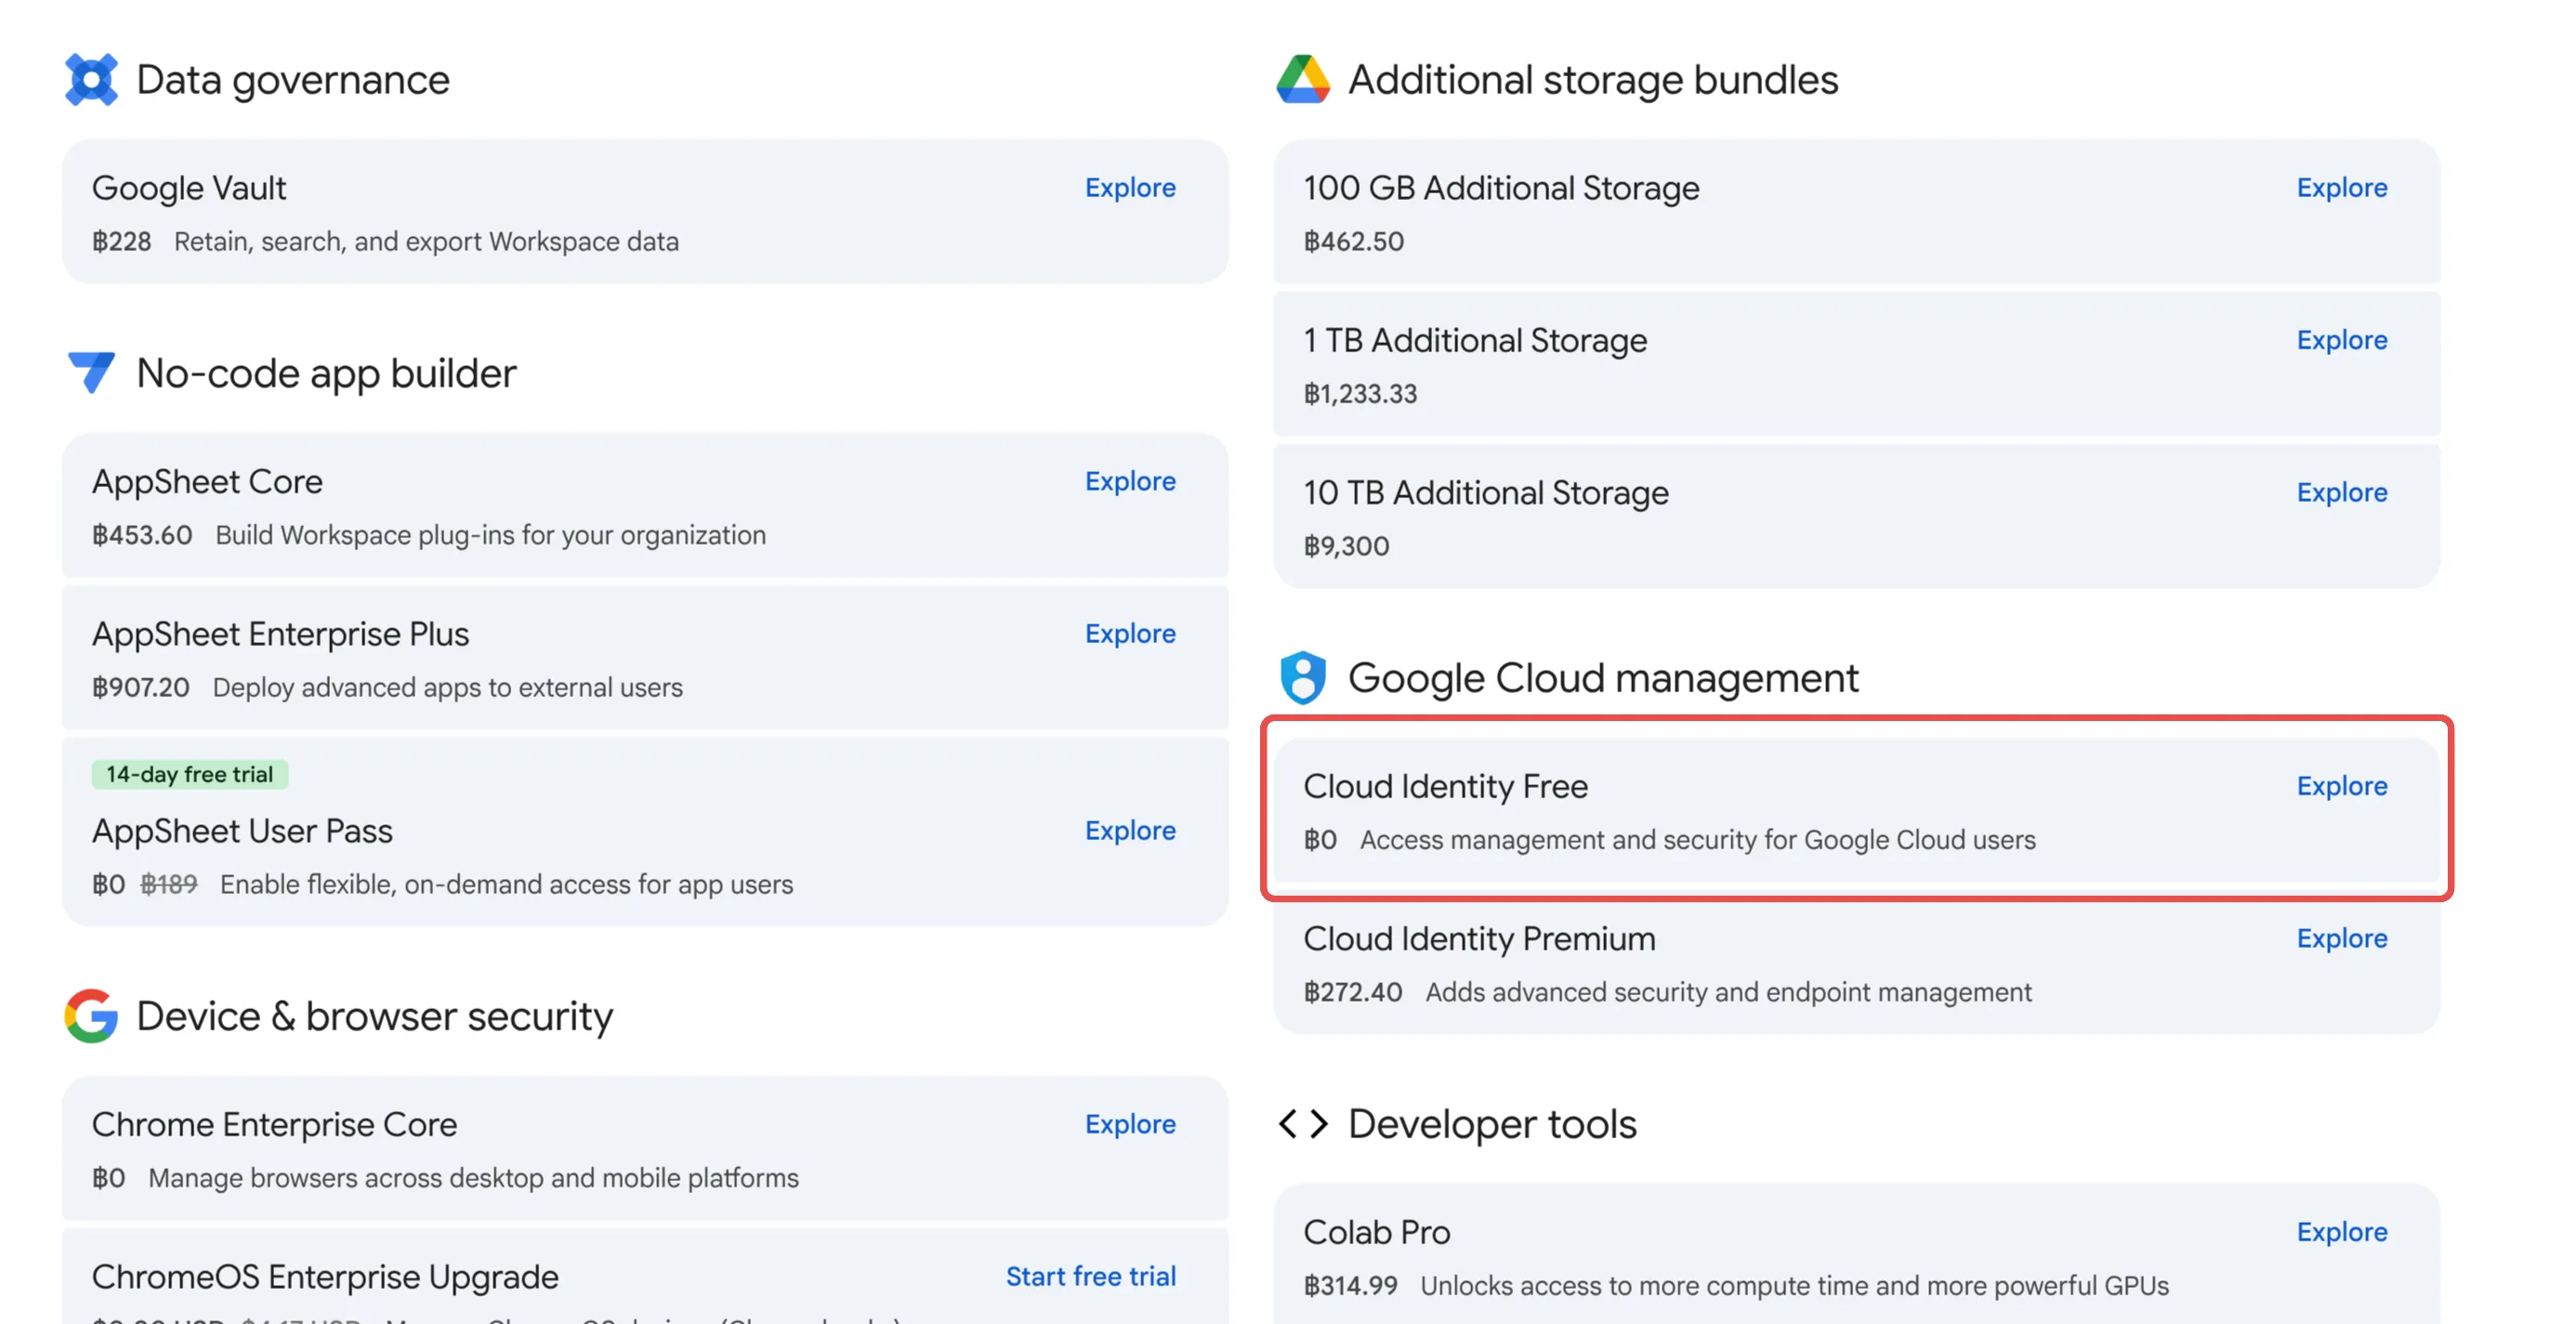
To add Google Cloud Identity, go to your Google Workspace Admin, to Billing -> Buy or upgrade and select Cloud Identity Free. Walk through the 3-step process to activate it.
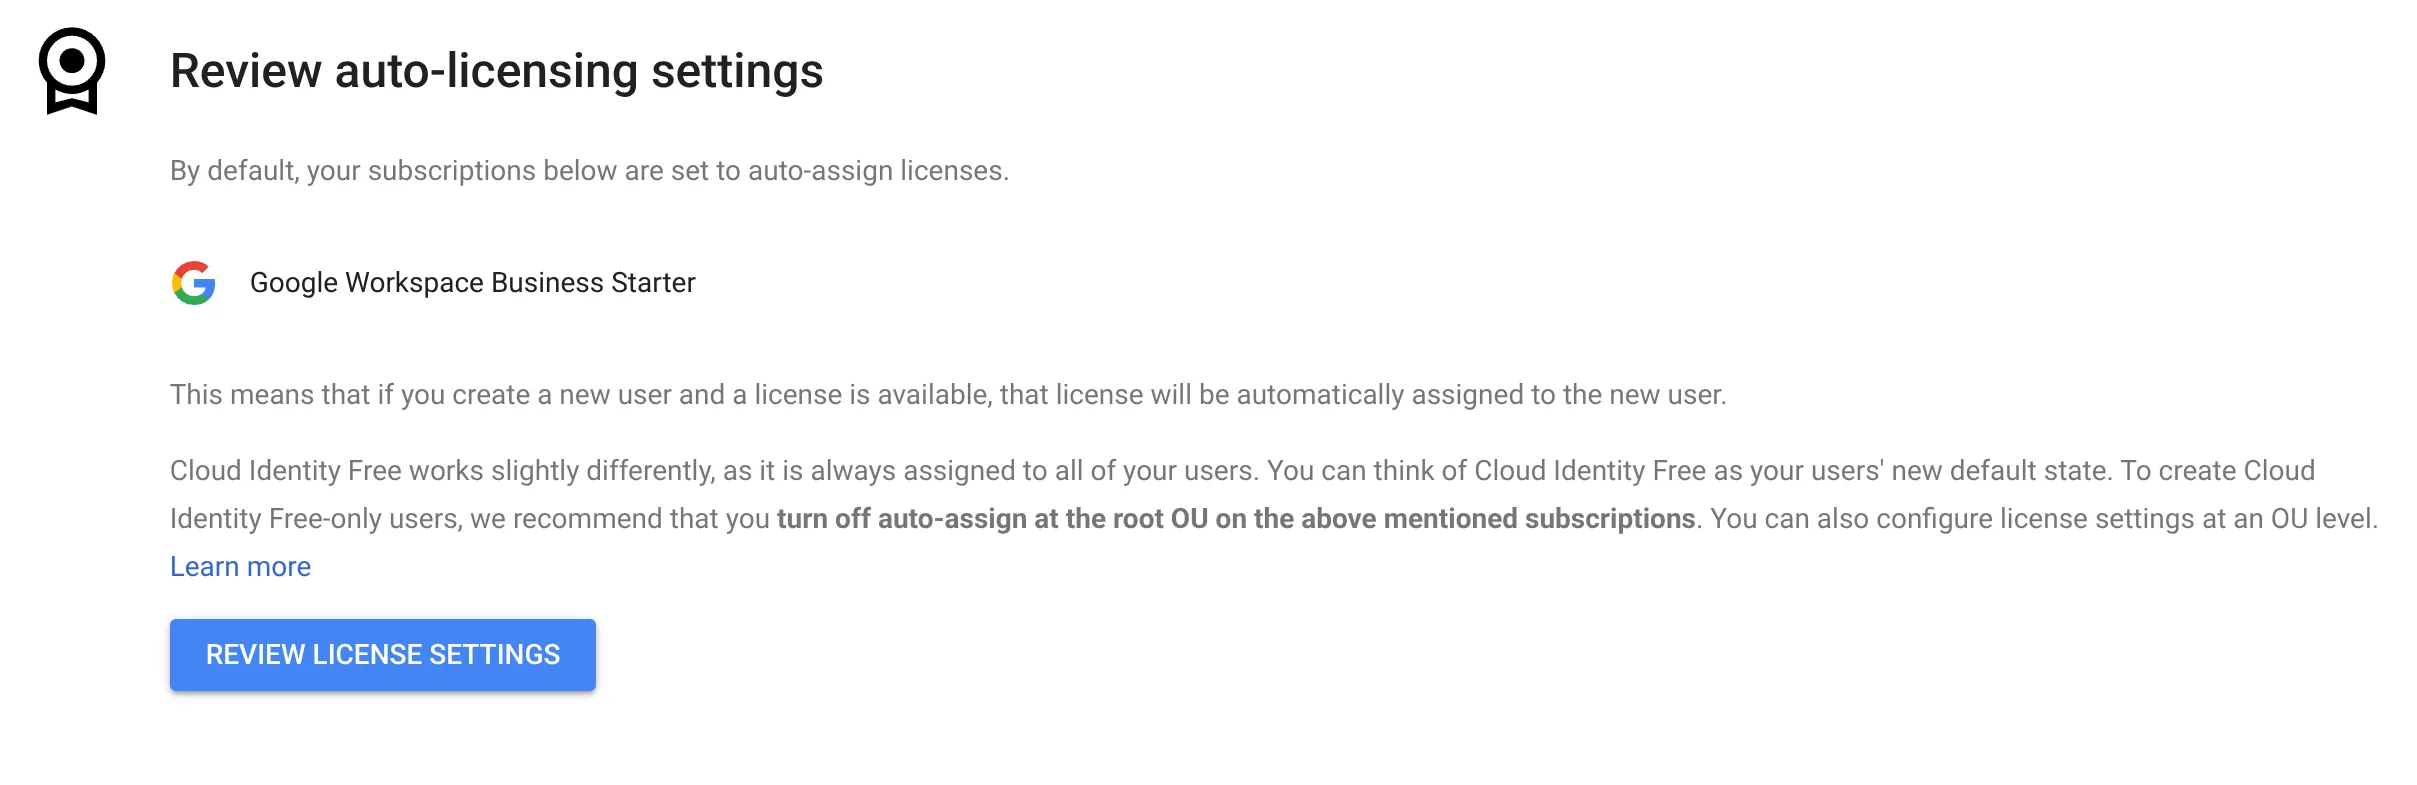
One thing to note though is that you will use the same user management screens as you do for your normal Google Workspace and when adding a user. New users will be assigned both a Cloud Identity license, as well as a Google Workspace license. After enabling Cloud Identity, you will be given an option to review the auto-licensing settings which is responsible to the auto-assignment of a Workspace license.
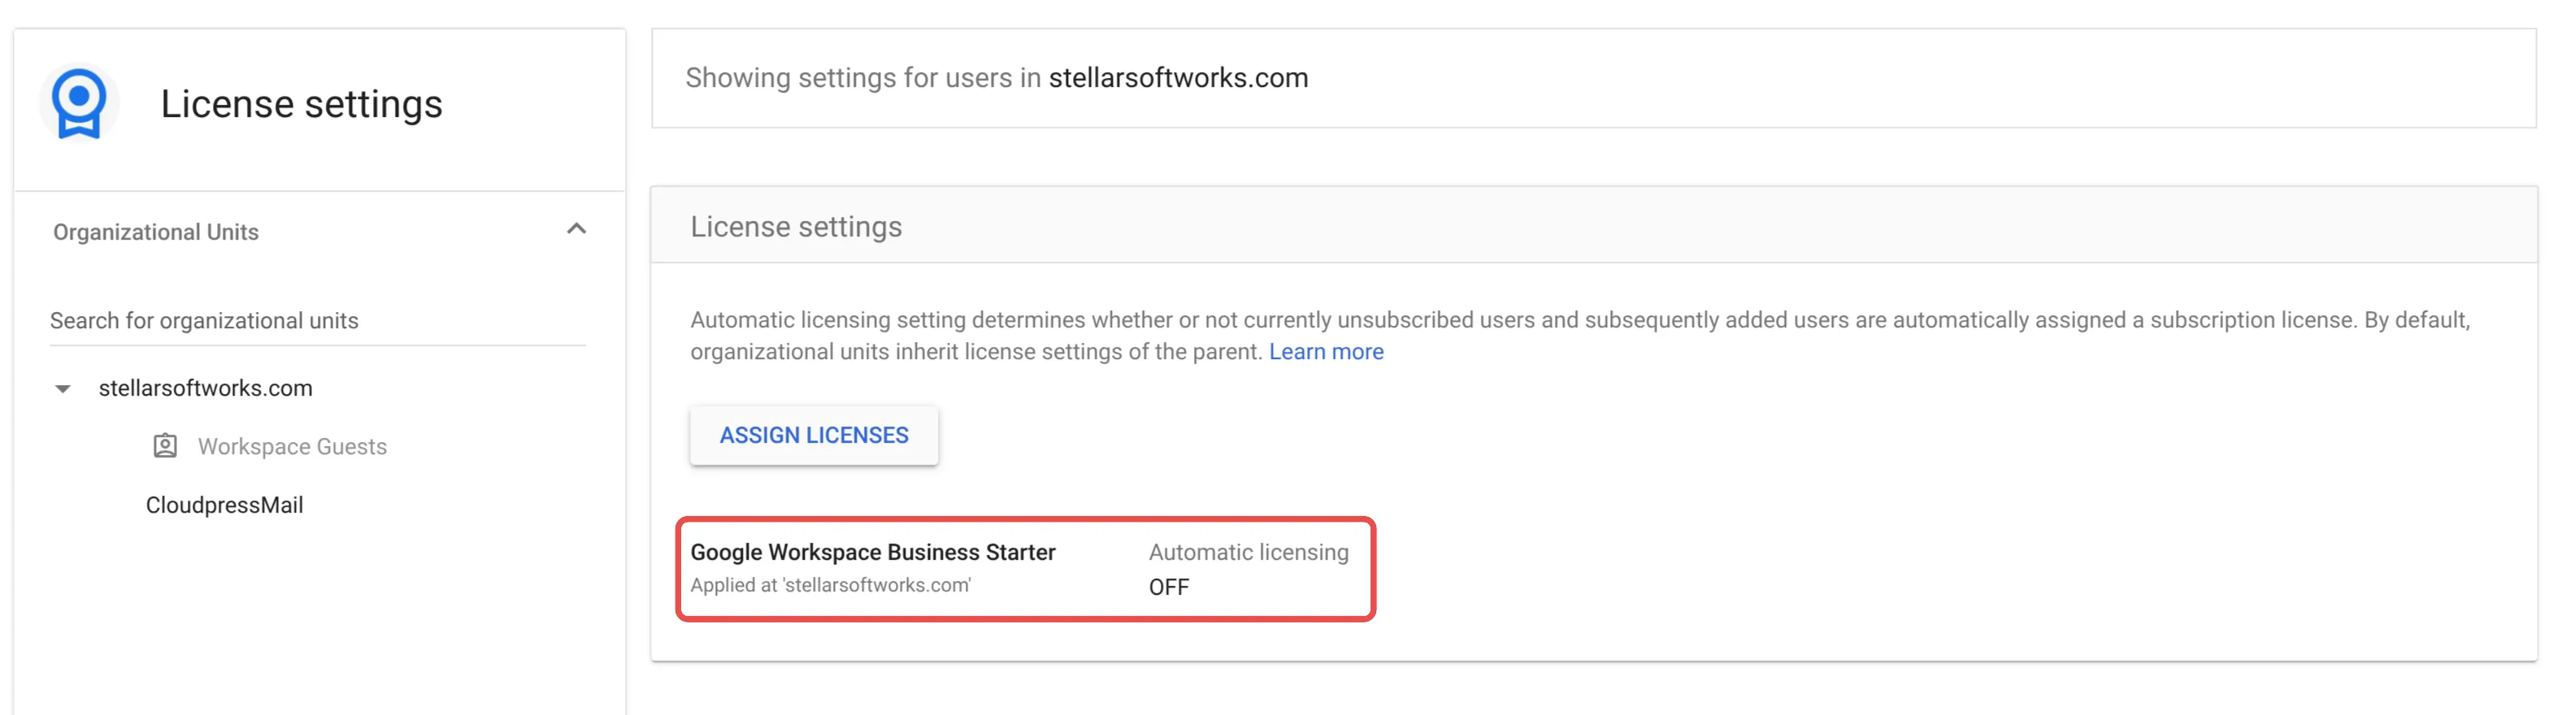
You can disable the auto-licensing, which will result in new users only being assigned a Cloud Identity licence.
If you’re afraid you’ll get things mixed up and accidentally assign Workspace licences, you can sign up for a Cloud Identity account which is completely separate from your existing Workspace account.
Conclusion
In this blog post I spoke about two different aspects around test users for your applications using Google authentication. The first aspect was allowing external users to access your application before it has been verified by Google. The second aspect was around creating free test users for testing managed Google accounts.