Introduction
In the previous blog post we went through the basics of authenticating a user in an ASP.NET Core application using Google authentication. It is time to step things up and move into more advanced territory, so in this blog post we’ll look at limiting users to a specific domain.
I’ll demonstrate the quick and easy way which is to simply restrict your OAuth application to internal users, then look at how you can limit external users to specific domains.
Restricting to internal users
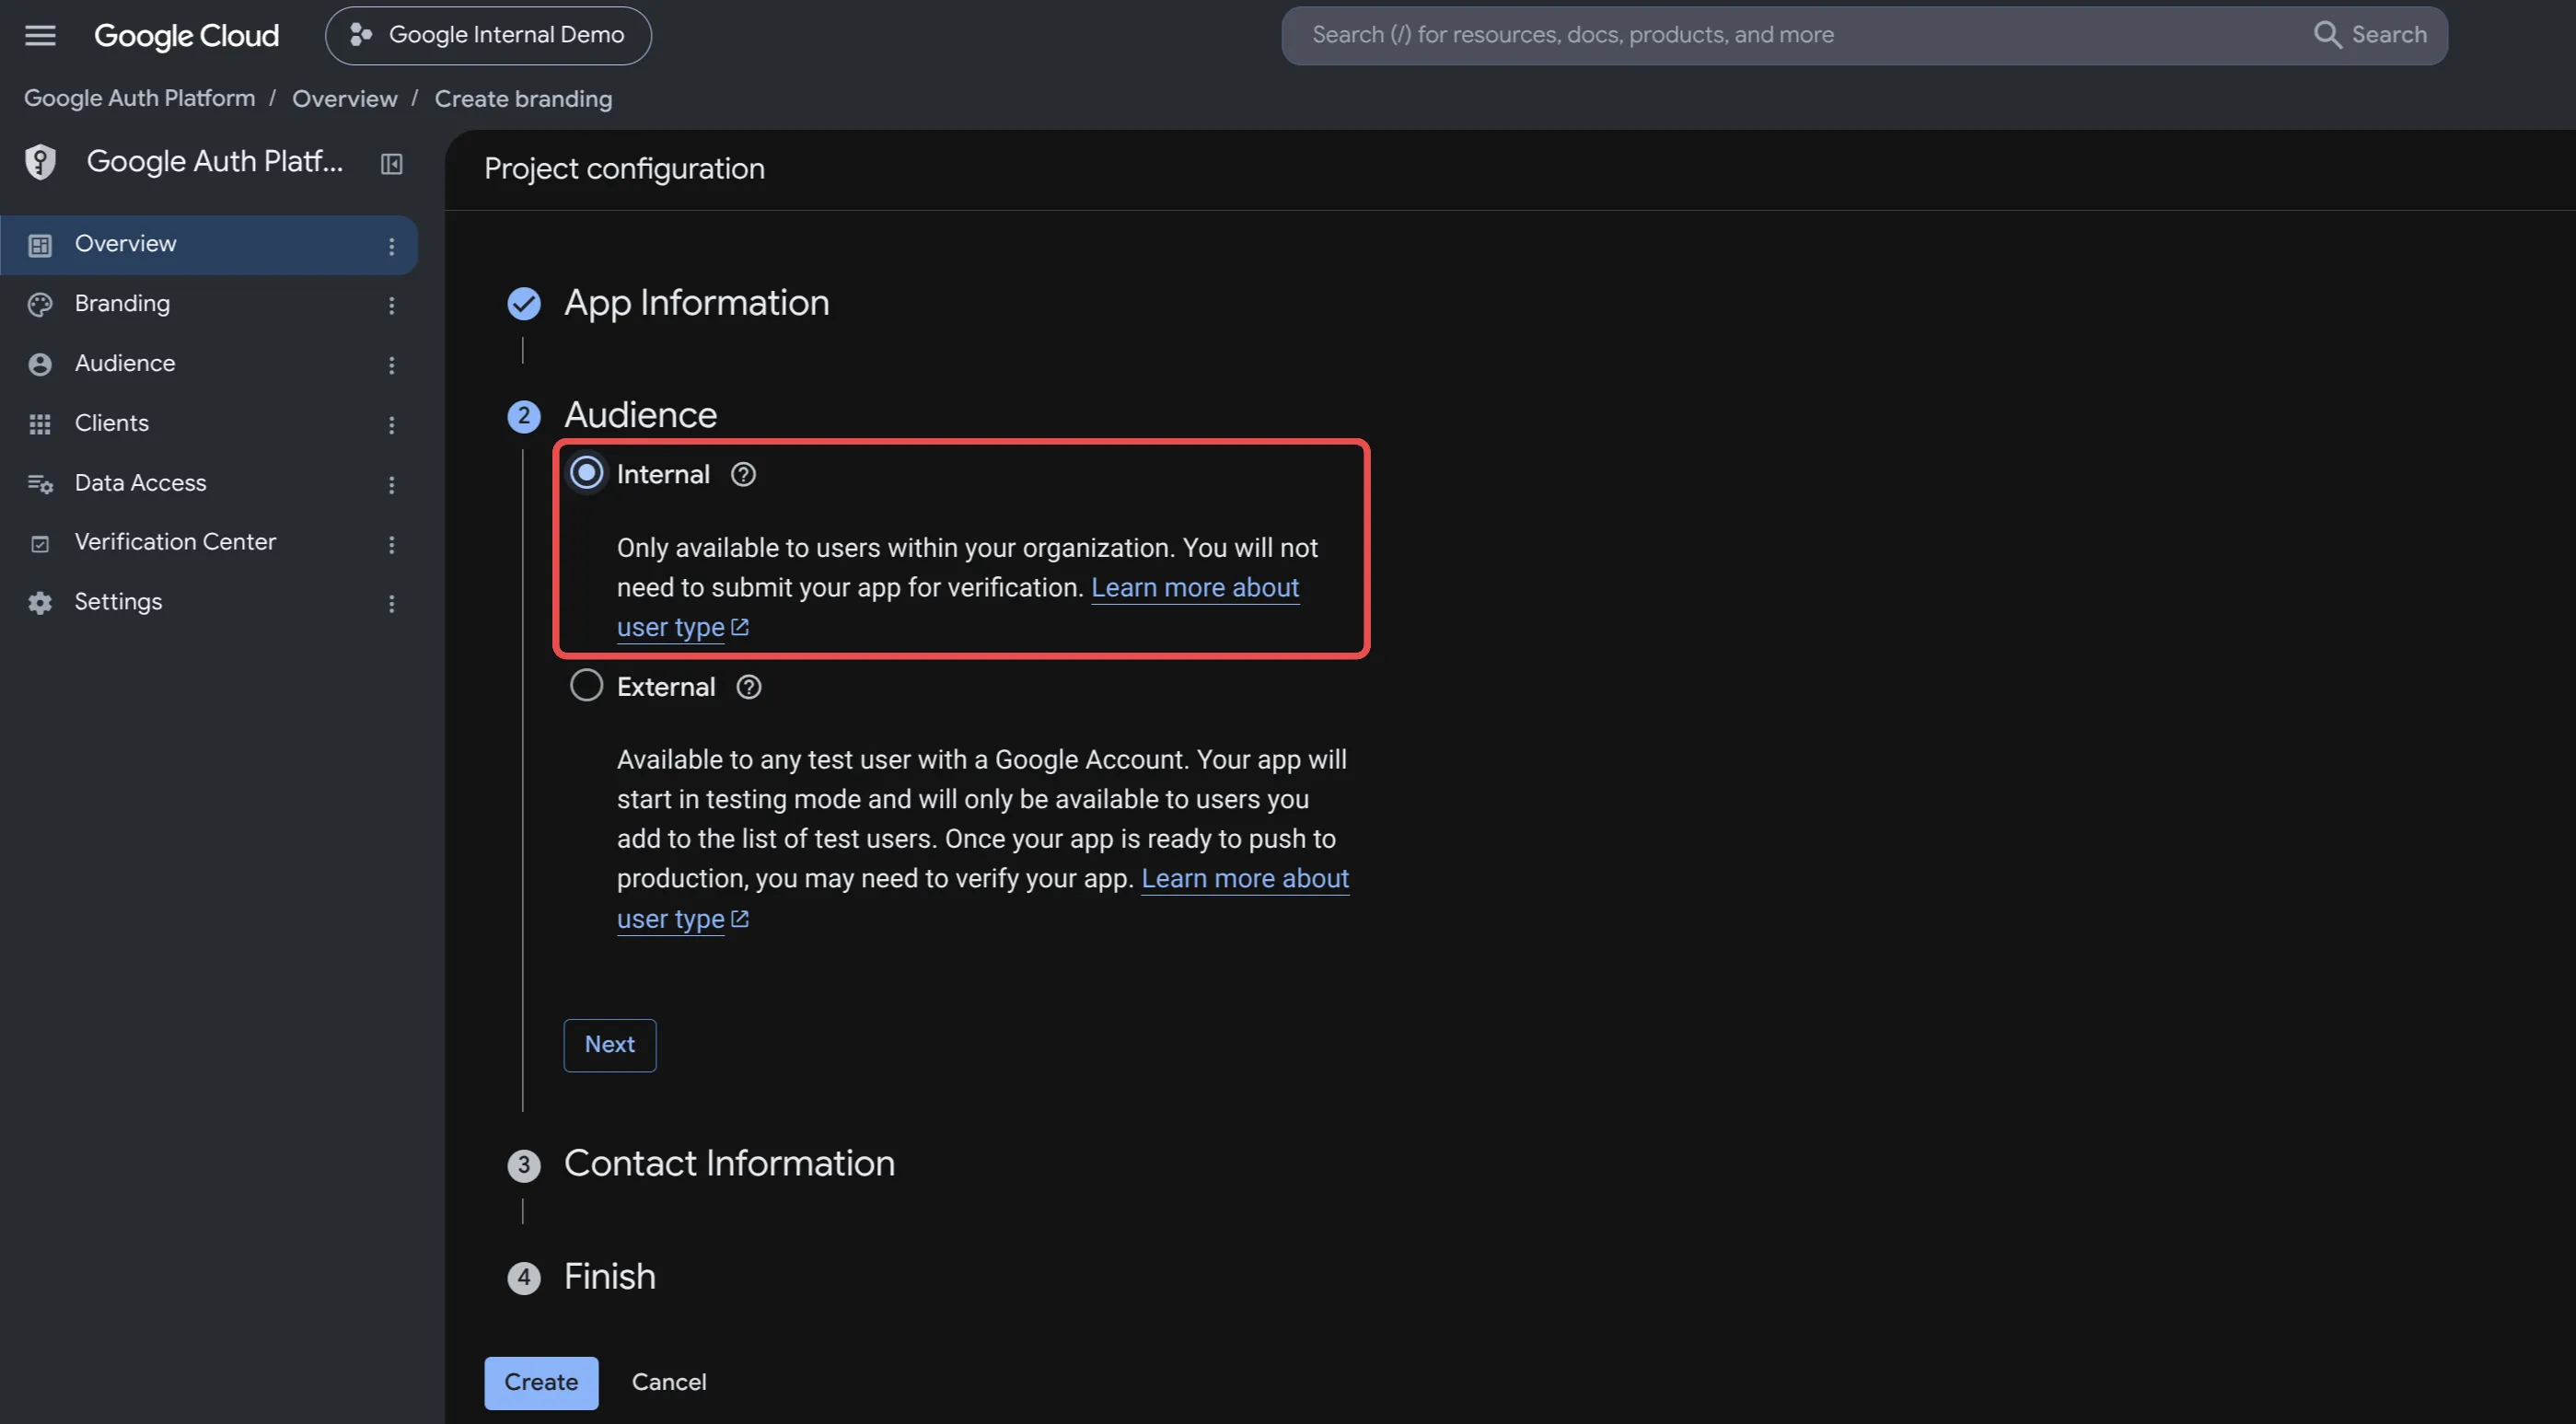
Often times when developers want to limit logins to users from a specific domain, it is because they want to limit access to the application to users from their own company. This can be achieved simply by configuring the OAuth application to internal users. You can do this when initially configuring your application by selecting the Internal options under the Audience section.
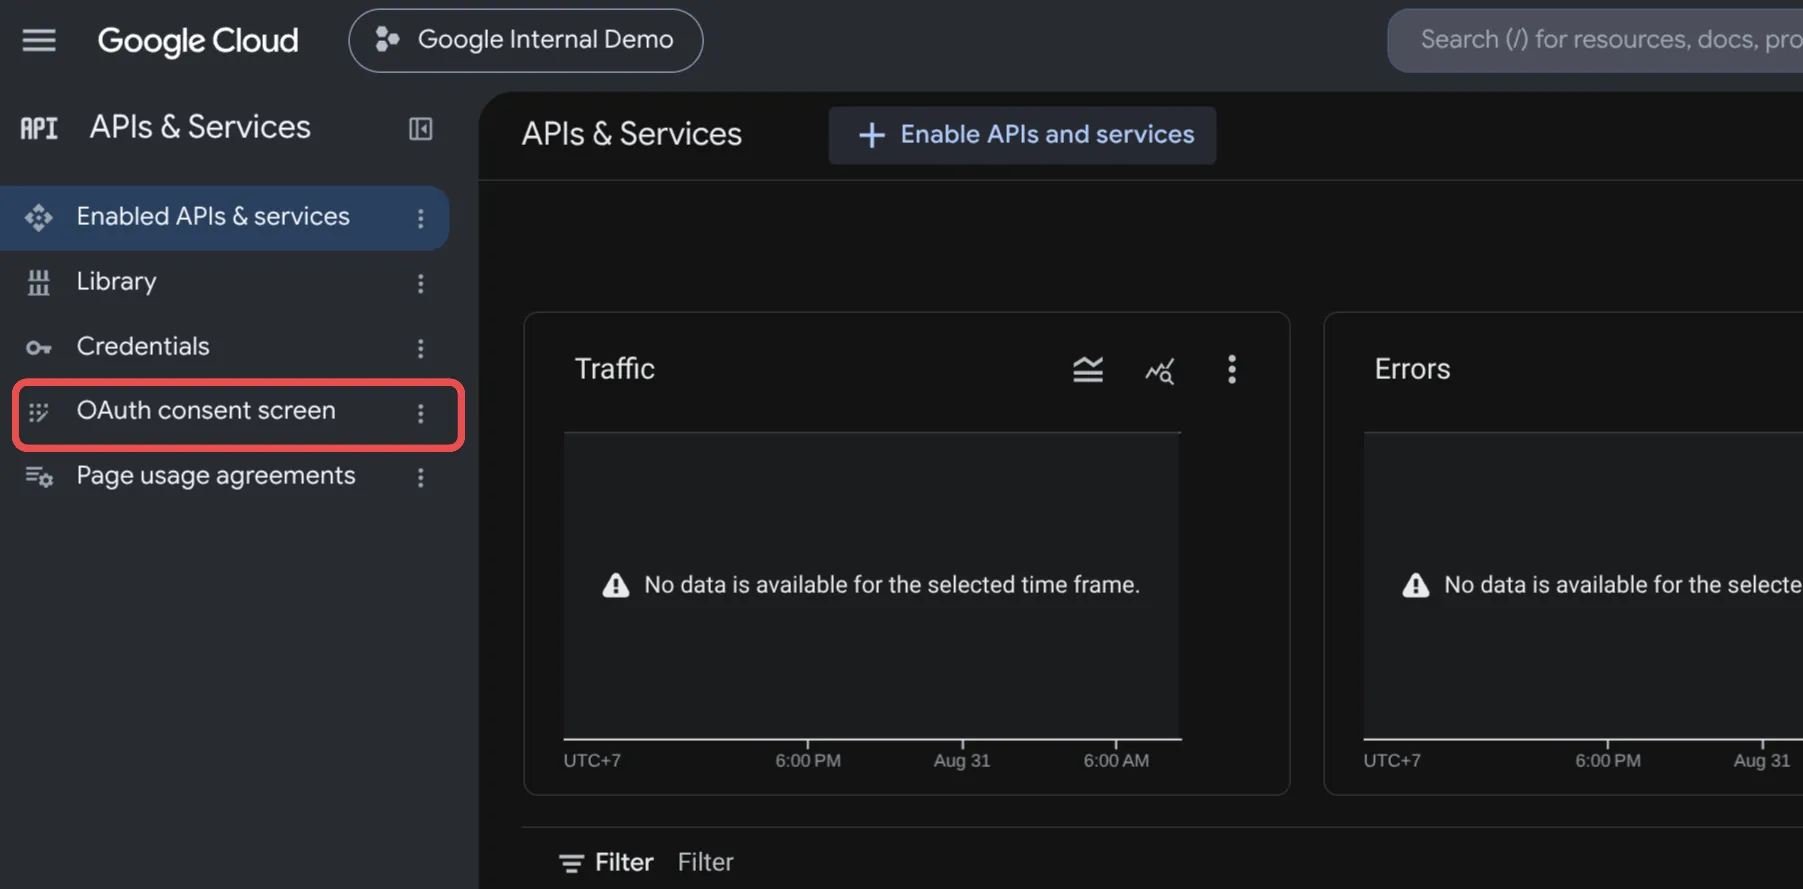
If you have previously configured the OAuth application and want to change it, navigate to the APIs & Services section of your application in Google Cloud Console, then click on the OAuth consent screen option in the navigation bar.
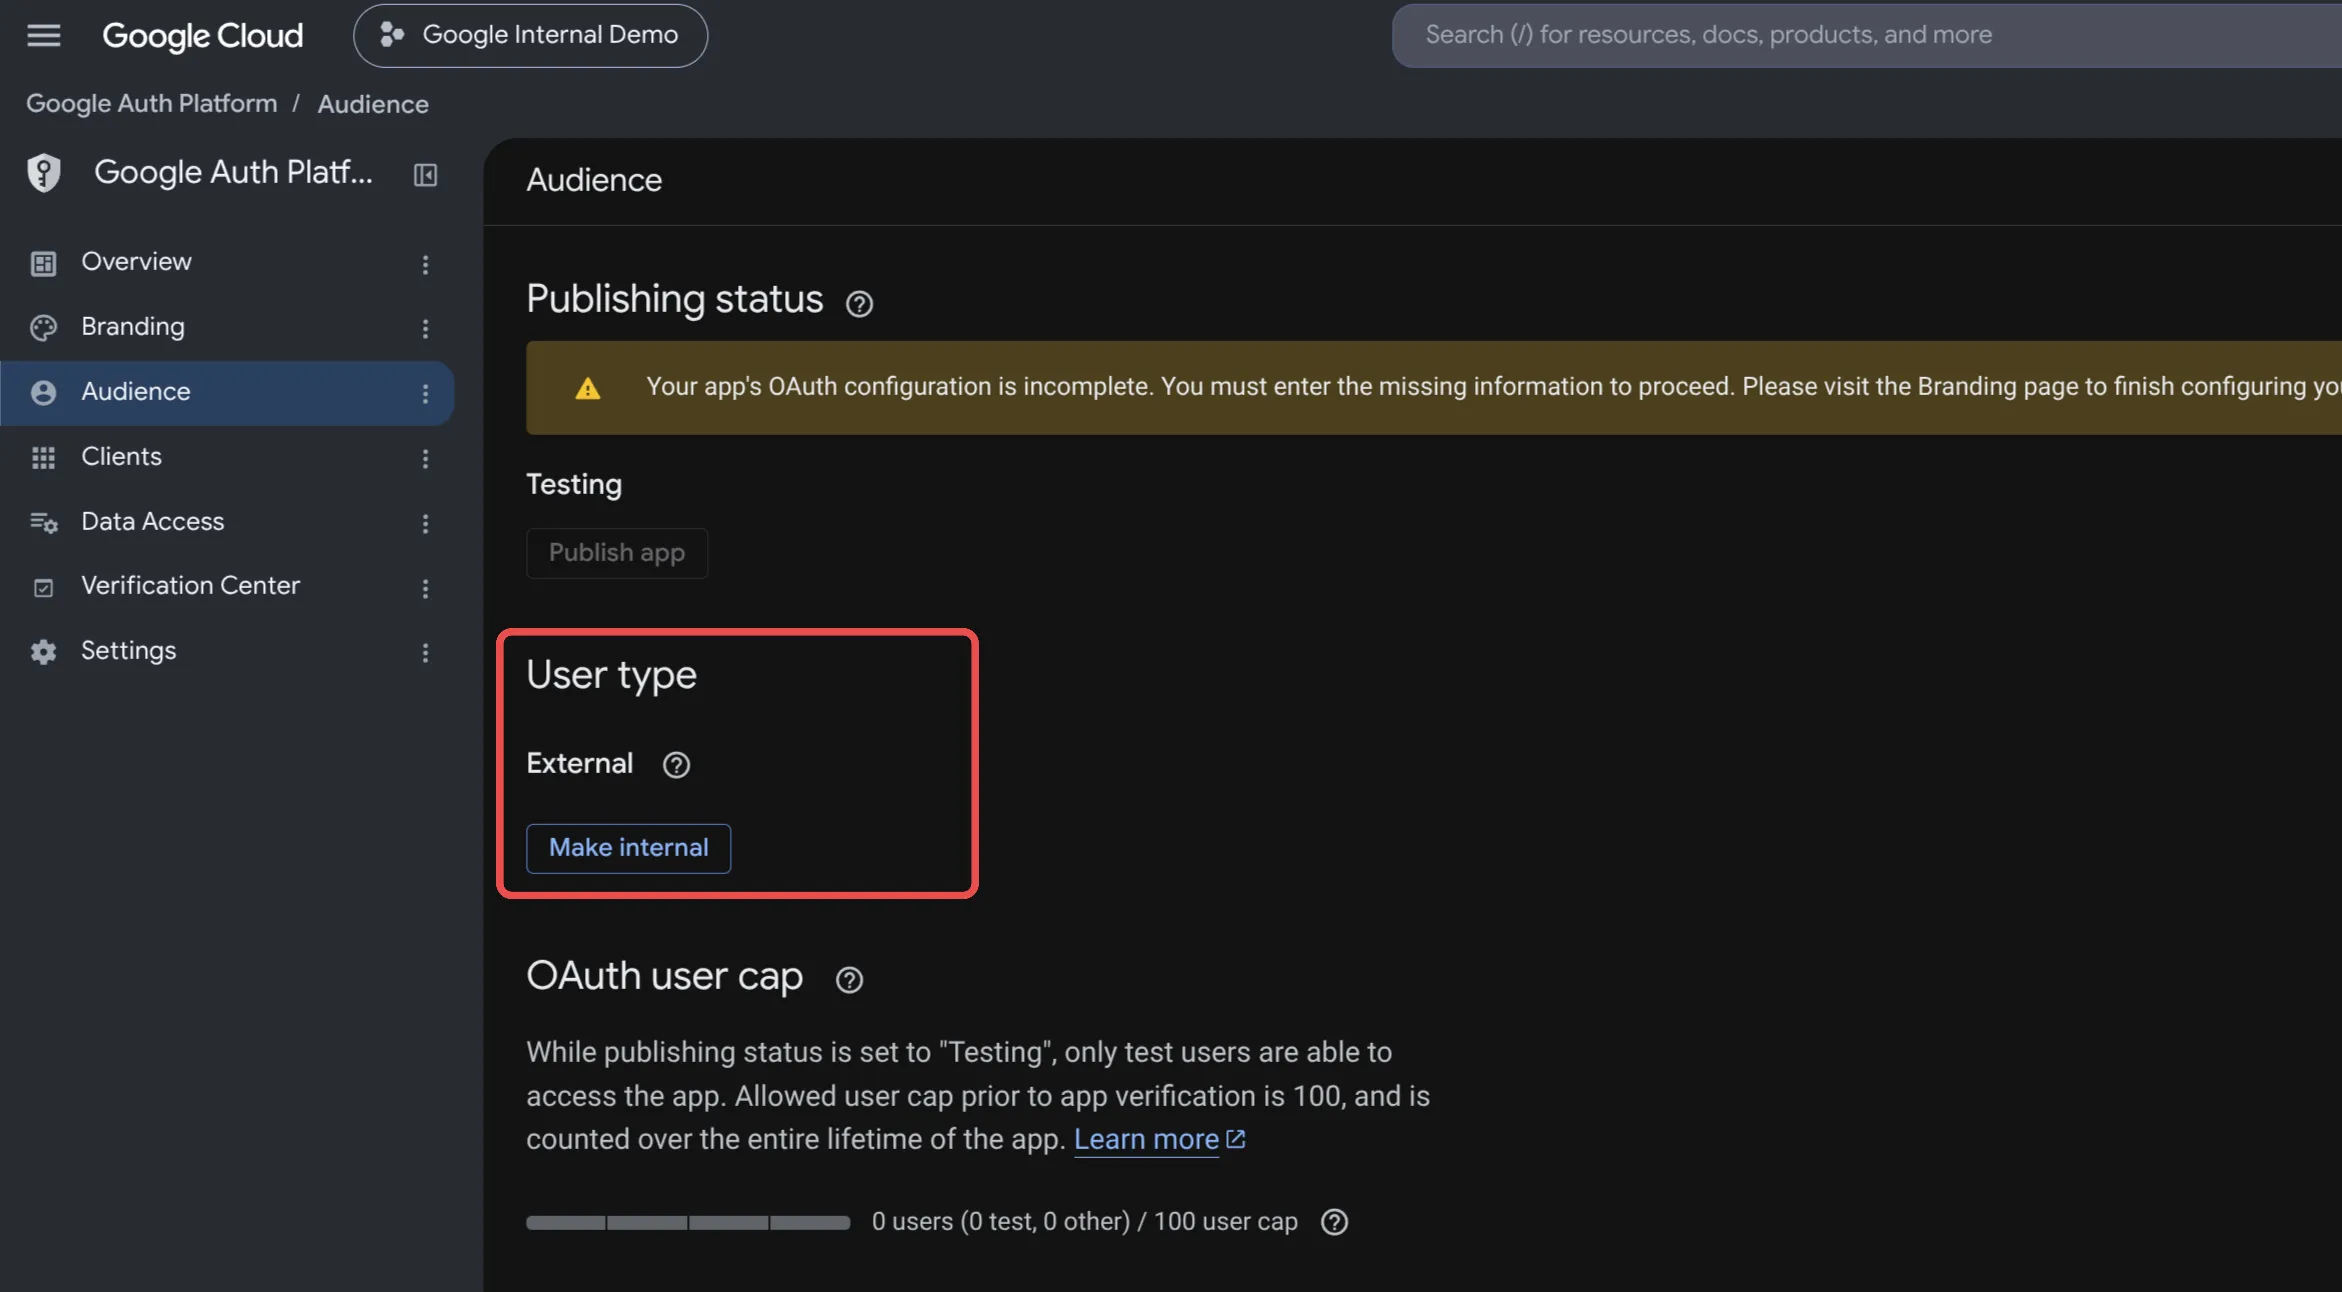
Navigate to the Audience, then click the Make internal button.
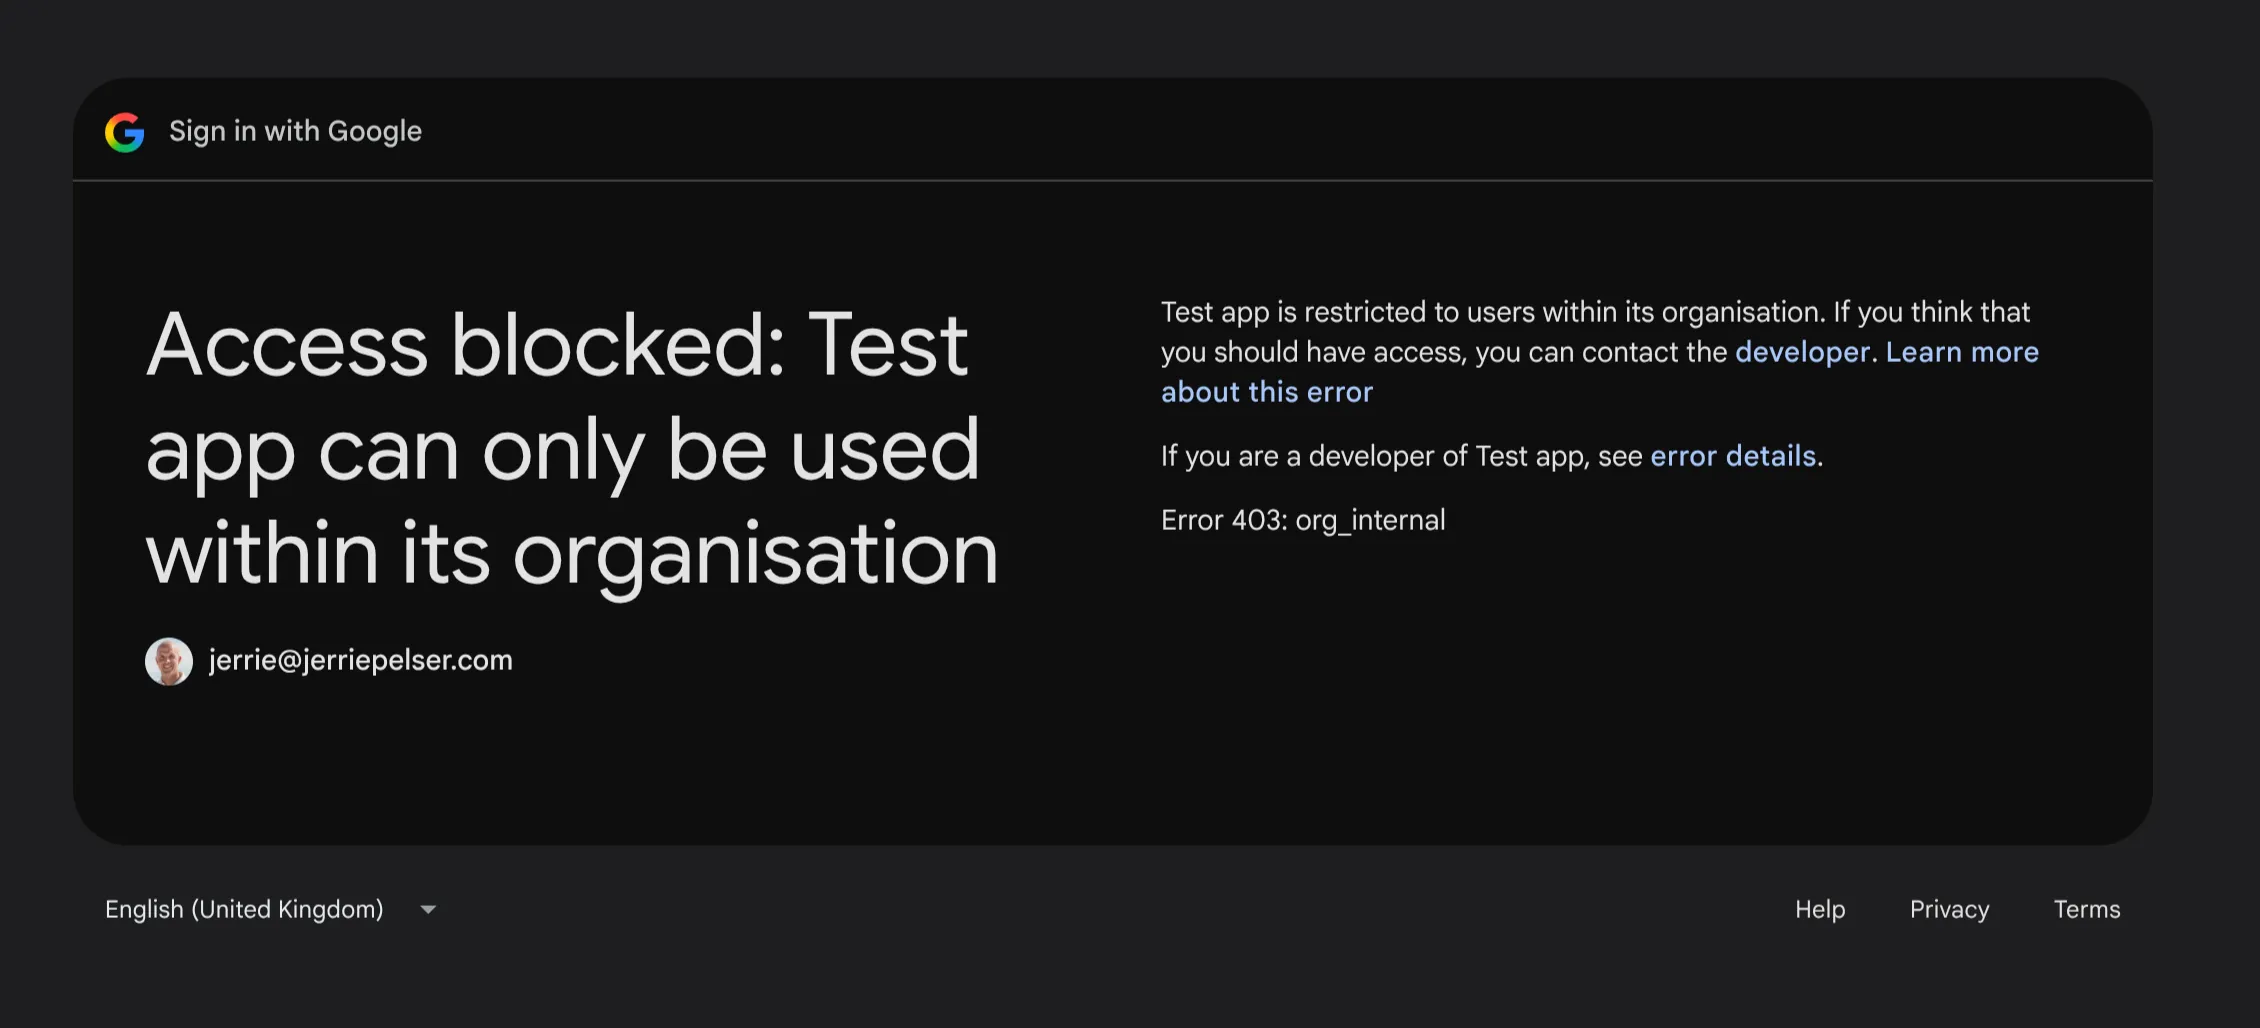
With this setting in place, when a person who does not belong to your Google Workspace organization attempts to log in to the application, they will get an error message indicating that the application is restricted to users inside the organization.
If your goal is to simply restrict the application to internal users, this is by far the easiest way to achieve this goal and requires no application code changes.
Another benefit of this approach is that if your application requires access to sensitive or restricted scopes, you do not have to go through a tricky approval process.
Extracting the user’s domain
Now let’s move on to the scenario where you have an application that is available to external users, but you still want to limit access to specific domains.
You may, for example, have an application that is available to internal users as well as certain partners who have their own Google Workspace accounts. Or it may be that your organization has multiple Google Workspace accounts for different divisions or subsidiaries.
When authenticating a user with the Google OIDC provider, Google returns an hd claim that contains the domain associated with the user’s account in the ID Token when the user belongs to a Google Cloud organization.
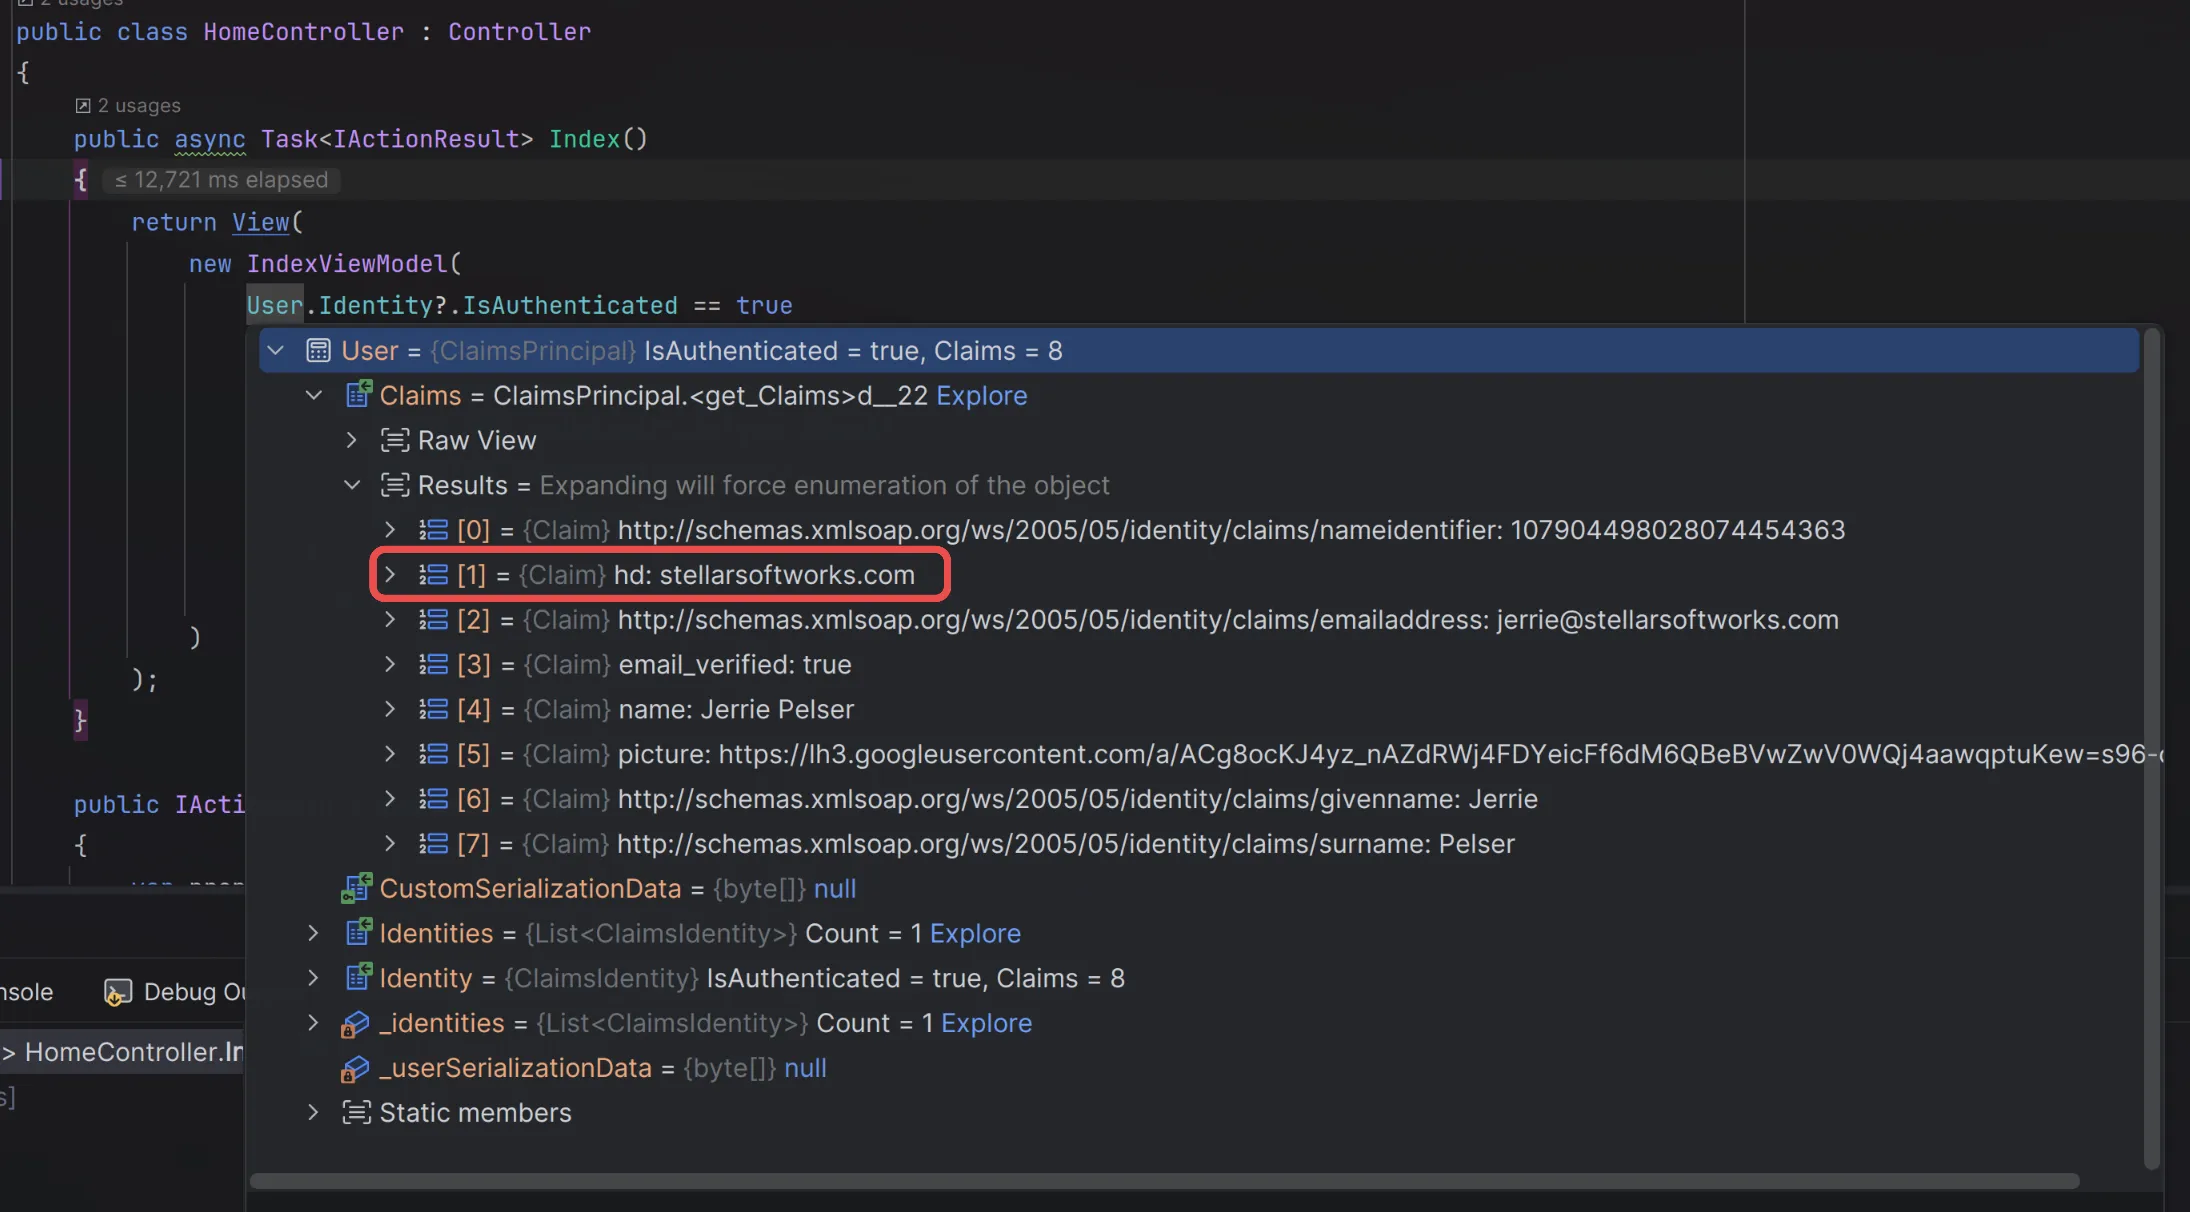
So, all we need to do is to extract the value of this claim. If it is null we know the user logged in with a personal account. If it contains a value, we will know that the user signed in with an organization account and we will know the domain.
We can update the example code from the previous blog post to extract this information.
public class HomeController : Controller{ public async Task<IActionResult> Index() { return View( new IndexViewModel( User.Identity?.IsAuthenticated == true ? new IndexViewModel.UserViewModel( User.FindFirstValue("name"), User.FindFirstValue(ClaimTypes.Email), User.FindFirstValue("picture"), User.FindFirstValue("hd") ) : null ) ); }}We can also update the user information card to display the user’s domain or, alternatively, the fact that they logged in with their personal account.
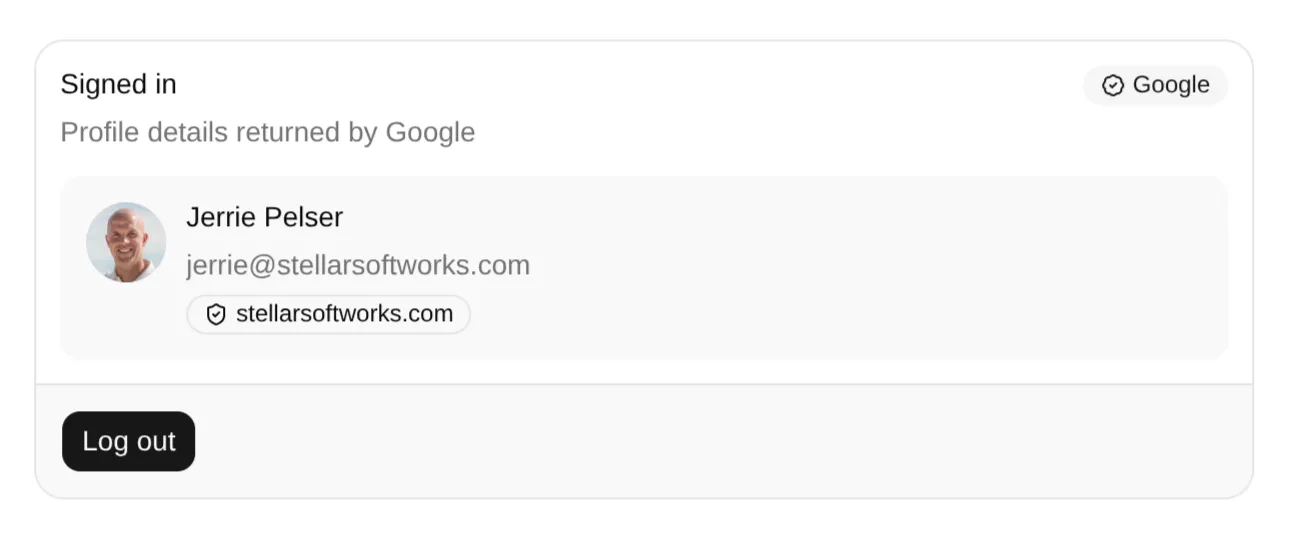
<!-- code omitted for brevity --><sa-item-content> <sa-item-title>@Model.User.Name</sa-item-title> <sa-item-description>@Model.User.Email</sa-item-description> <div> @if (Model.User.Domain == null) { <sa-badge variant="BadgeVariant.Outline"> Personal Account </sa-badge> } else { <sa-badge variant="BadgeVariant.Outline"> <sa-icon name="shield-check"/> @Model.User.Domain </sa-badge> } </div></sa-item-content>When we run the application and log in with an account on a managed (i.e. Google Workspace) account, we will see the user’s domain.
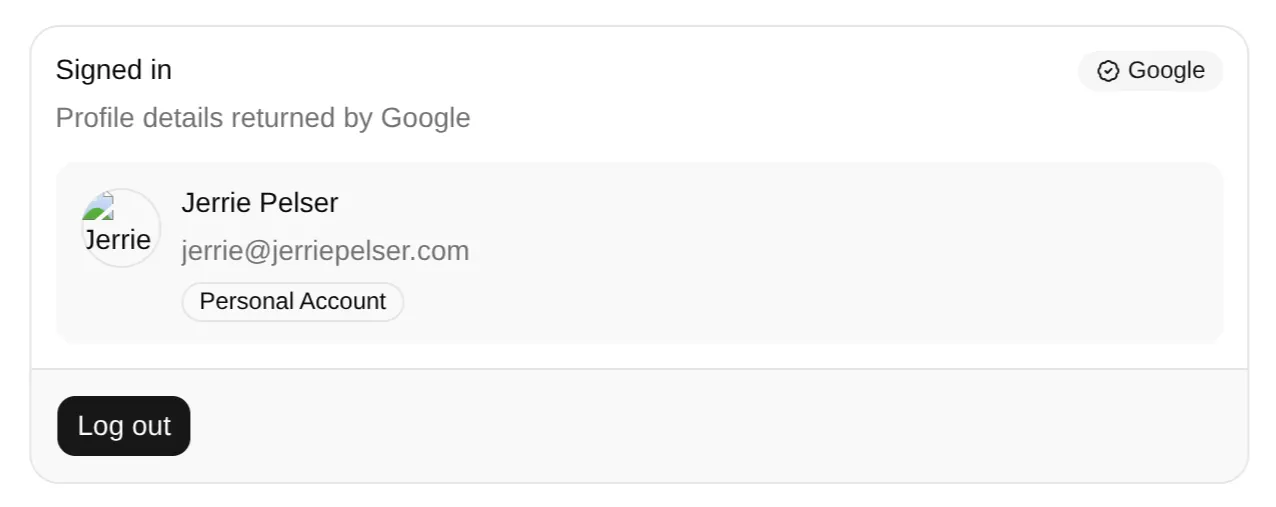
Likewise, logging in with a personal account will display this fact.
Limiting logins based on certain domains
Now let’s restrict the application to specific domains. For the purposes of this demo, I will declare a list of allowed domains on the configuration file.
{ "Authentication": { "AllowedDomains": ["stellarsoftworks.com"] }}I will use the Options pattern for the configuration, so let’s declare a class we’ll bind the settings to, along with some validation rules.
public class AuthenticationOptions{ [MinLength(1, ErrorMessage = "At least one allowed authentication domain must be specified.")] public required string[] AllowedDomains { get; set; } = [];}And bind the options in our Program.cs.
var builder = WebApplication.CreateBuilder(args);
builder .Services.AddOptions<AuthenticationOptions>() .Bind(builder.Configuration.GetSection("Authentication")) .ValidateDataAnnotations() .ValidateOnStart();Next, we can update the OIDC registration by adding a OnTokenValidated event handler where we check to confirm that (a) the user is logging in with an organization account, and (b) that the domain for that account is among the list of allowed domains.
// Add authentication servicesbuilder .Services.AddAuthentication(options => { //.. code omitted for brevity }) .AddCookie() .AddGoogleOpenIdConnect(options => { //.. code omitted for brevity
options.Events = new OpenIdConnectEvents { OnTokenValidated = context => { if (context.Principal?.FindFirstValue("hd") is not { } hdClaimValue) { context.Fail( "You cannot log in with personal Google Account. You must use a Google Workspace account" ); } else { var allowedDomains = context.HttpContext.RequestServices .GetRequiredService<IOptionsMonitor<AuthenticationOptions>>() .CurrentValue.AllowedDomains;
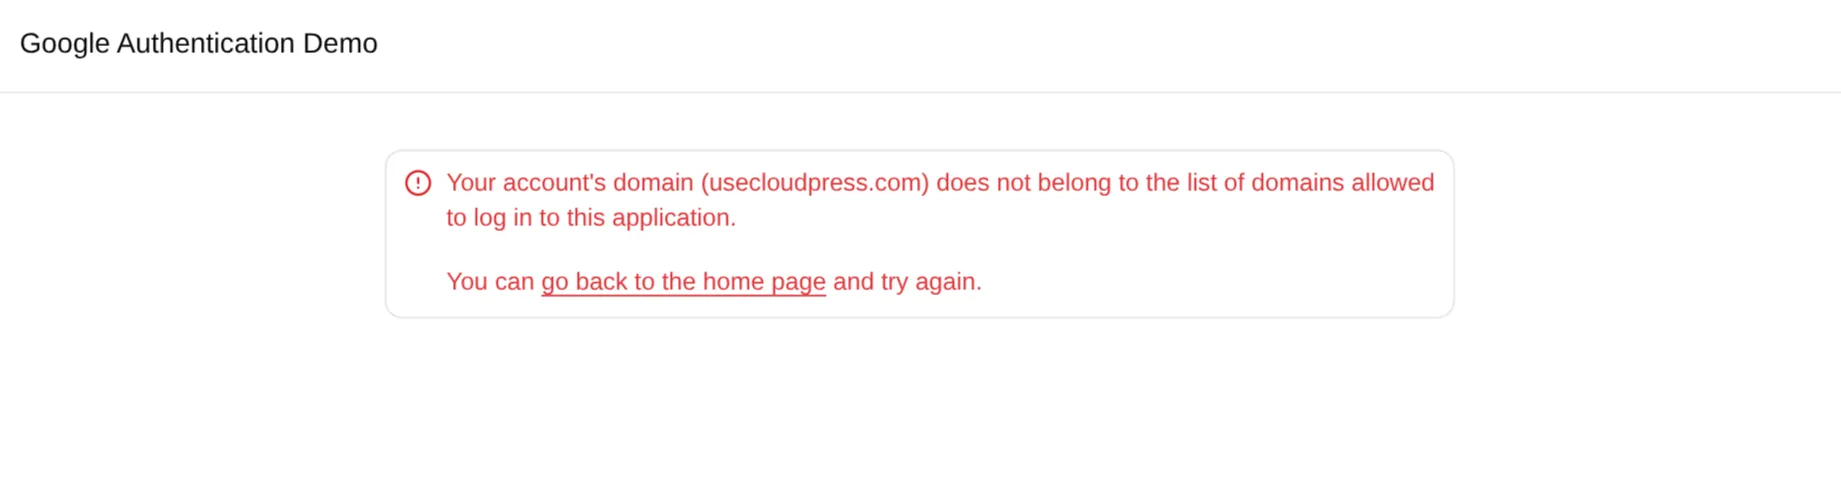
if (!allowedDomains.Contains(hdClaimValue, StringComparer.OrdinalIgnoreCase)) { context.Fail( $"Your account's domain ({hdClaimValue}) does not belong to the list of domains allowed to log in to this application." ); } }
return Task.CompletedTask; }, }; });Let’s give this a try and attempt to log in with a personal account.
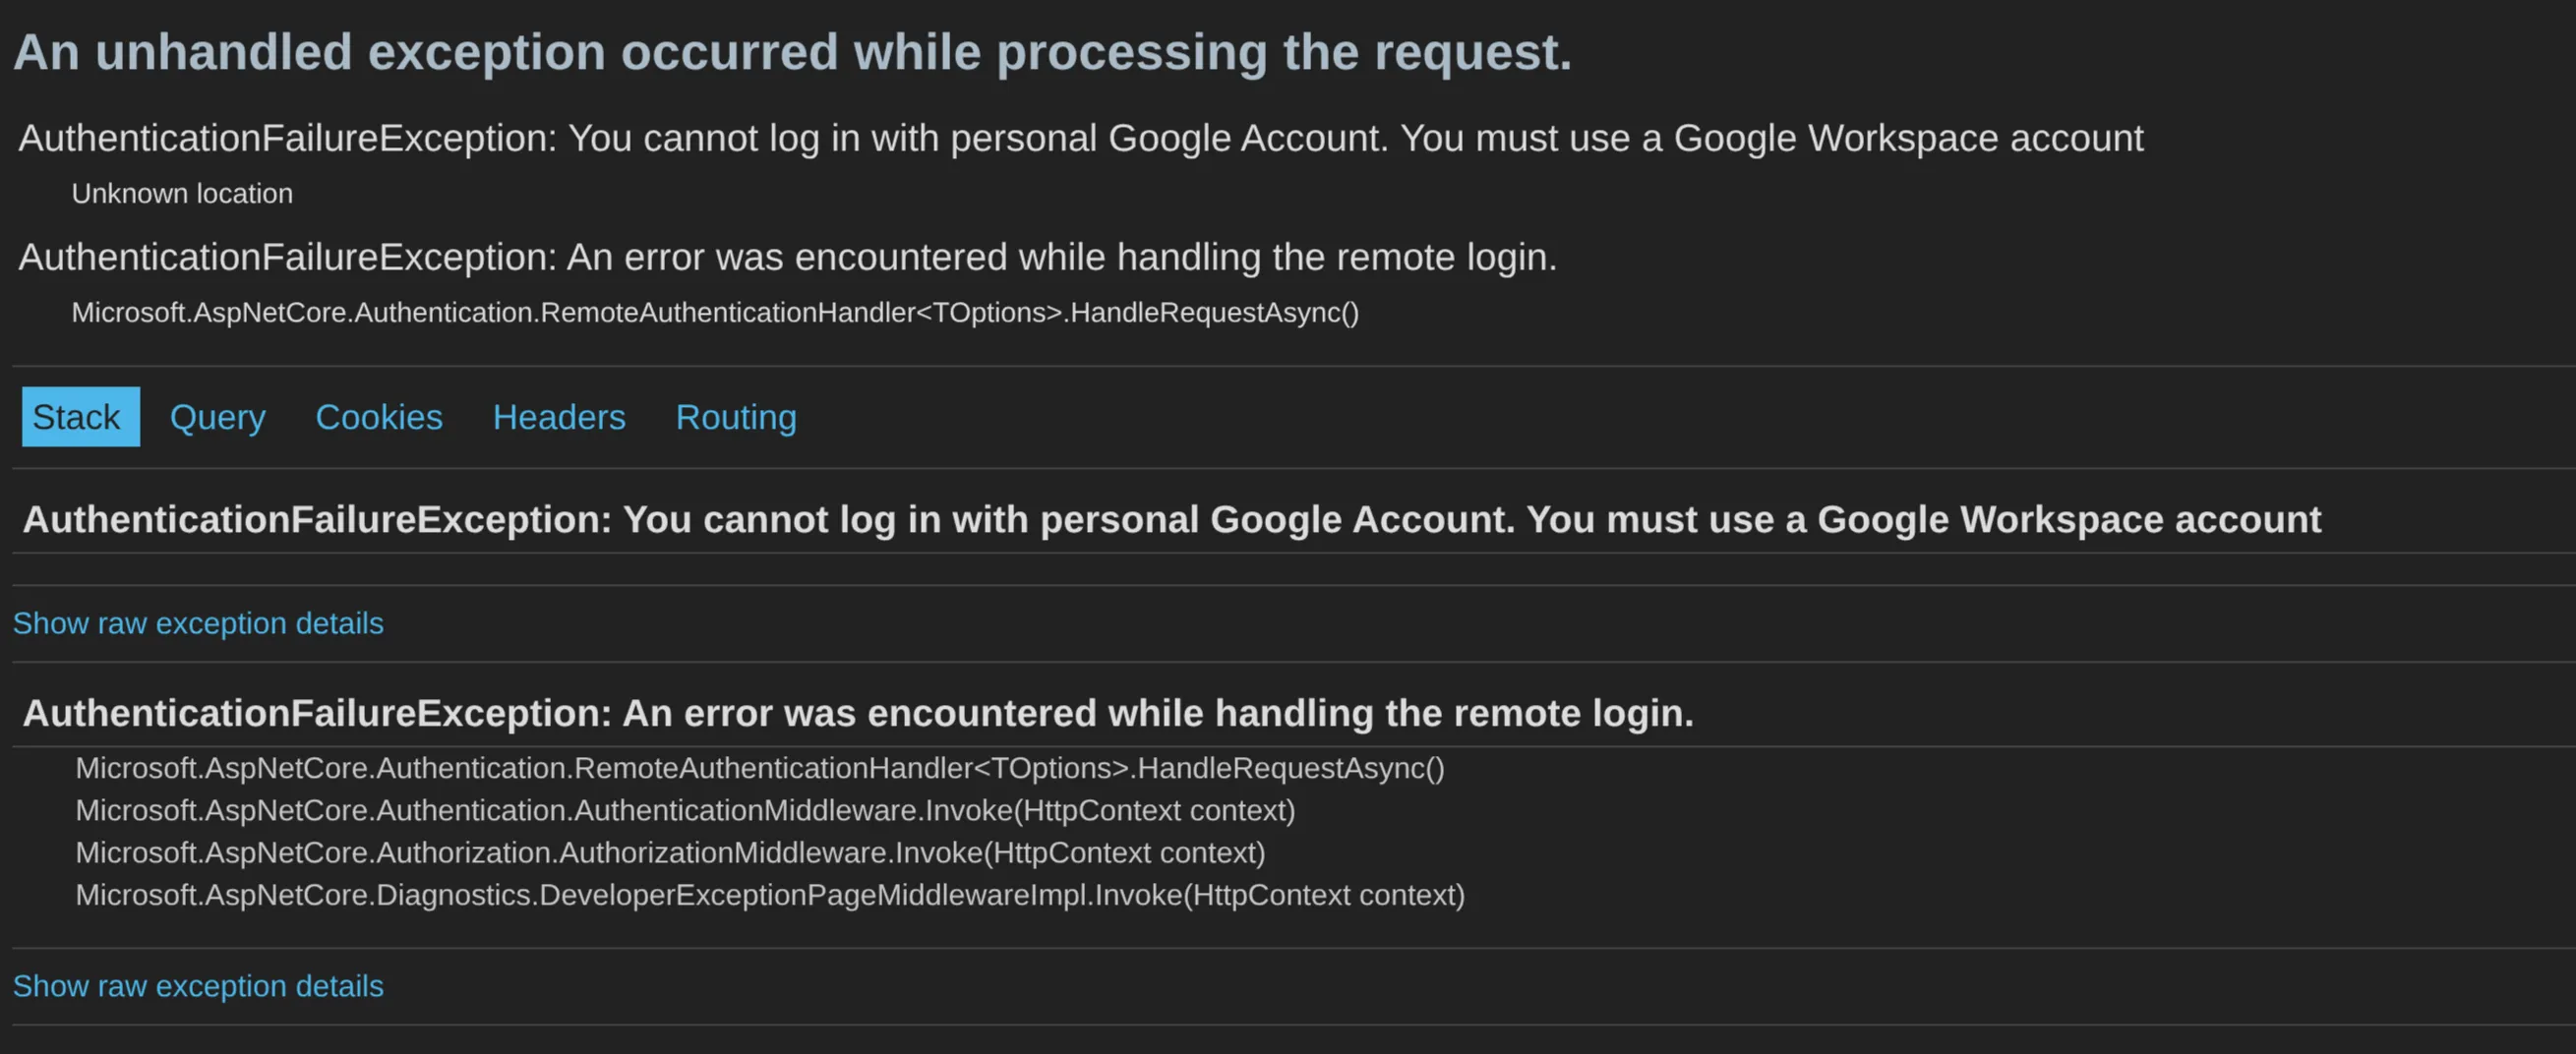
You can see we get an error indicating that you cannot log in with a personal account. The error is displayed in a nasty looking HTTP Status 500 (Internal Server Error) page, so let’s do something about that before trying the second scenario.
Displaying a better looking error message
To display a better error page, we need to redirect the user to a custom error page by handling the OnRemoteFailure event.
builder .Services.AddAuthentication(options => { //.. code omitted for brevity }) .AddCookie() .AddGoogleOpenIdConnect(options => { //.. code omitted for brevity
options.Events = new OpenIdConnectEvents { OnTokenValidated = context => { //.. code omitted for brevity }, OnRemoteFailure = context => { var errorMessage = context.Failure?.Message ?? "An unexpected error occurred while logging in with Google.";
context.Response.Redirect($"/LoginError?message={errorMessage}");
context.HandleResponse();
return Task.CompletedTask; }, }; });We can add a controller action to handle the /LoginError and update the Razor view to display something better looking to the user. Now, when we test the second scenario where we log in with an organization account with a domain that is not allowed, you can see the new error page displayed to the user.
Conclusion
In this blog post I demonstrated two approaches of limiting access to your application to users from specific domains. The first approach was to simply configure the OAuth application as an internal application. The second approach was to inspect the hd claim and validate that the user’s domain belongs to a specific set of allowed domains.
All source code for this blog post can be found on GitHub.