Introduction
In the previous blog post, I demonstrated how we can create a local user account when users sign in with Google. This helps for fast lookups of user information and enforcing referential integrity.
One potential problem with that solution is that the ID we use for the user in the database is the one that is returned from Google. This may be what you are after, but in most cases I’d argue that it is better to make the user’s ID independent of any identity provider.
We can use a database generated value such as a GUID on integer as the ID and store the Google User ID as a separate value. If, in the future, we decide to allow for alternate authentication providers, we can store the user identifier returned from those providers as separate values against our user.
Remodelling the user table
There are several approaches we can take for modelling the relationship between a user and the authentication provider. One way would be to take the approach that ASP.NET Core Identity takes which is to create a separate table (AspNetUserLogins in their case) for the authentication provider identities with a relationship between that table and the user table.
We could also store the authentication provider’s user identifier as a property on the User entity - one property per authentication provider. It is a simpler model and has a few limitations, such as not allowing a user to link multiple accounts for a single authentication provider. This is the model we’ll go for in this blog post.
public class User{ public int Id { get; set; }
public required string Name { get; set; }
public required string GoogleUserIdentifier { get; set; }}As you can see, we changed the Id from the previous blog post to an integer and added a new GoogleUserIdentifier property which will store the user ID returned from Google. In this particular case, we are making this a required property, but if your app supports other identity providers, you’ll probably want to keep this property as nullable.
We will also need to update the Task entity to take the data type change into account.
public class Task{ // ...some code omitted for brevity
public required int CreatedByUserId { get; set; }
public User CreatedBy { get; set; }}We will also need to update the database context configuration. Take note of the unique index we add for the GoogleUserIdentifier. This ensures that we can do fast lookups based on the GoogleUserIdentifier and also ensure we do not have more than one user account for the same Google User ID.
public class ApplicationDbContext(DbContextOptions options) : DbContext(options){ // ...some code omitted for brevity
protected override void OnModelCreating(ModelBuilder modelBuilder) { base.OnModelCreating(modelBuilder);
modelBuilder.Entity<Task>(builder => { builder.HasOne(e => e.CreatedBy).WithMany().HasForeignKey(e => e.CreatedByUserId); });
modelBuilder.Entity<User>(builder => { builder.HasKey(e => e.Id);
builder.Property(e => e.Id); builder.Property(e => e.Name).HasMaxLength(200); builder.Property(e => e.GoogleUserIdentifier).HasMaxLength(50);
builder.HasIndex(e => e.GoogleUserIdentifier).IsUnique(); }); }}Creating the local user
Creating the user is very similar to the code from the previous blog post, but this time we search for an existing user by the GoogleUserIdentifier property. If we do not find and existing user, we create a new one.
builder .Services.AddAuthentication(options => { // ...some code omitted for brevity }) .AddCookie() .AddGoogleOpenIdConnect(options => { // ...some code omitted for brevity
options.Events = new OpenIdConnectEvents { OnTicketReceived = async context => { var googleUserId = context.Principal!.FindFirstValue(ClaimTypes.NameIdentifier)!; var googleUserName = context.Principal!.FindFirstValue("name")!;
var dbContext = context.HttpContext.RequestServices.GetRequiredService<ApplicationDbContext>(); var user = await dbContext.Users.FirstOrDefaultAsync(u => u.GoogleUserIdentifier == googleUserId );
if (user != null) { user.Name = googleUserName; } else { user = new User { Name = googleUserName, GoogleUserIdentifier = googleUserId }; await dbContext.Users.AddAsync(user); }
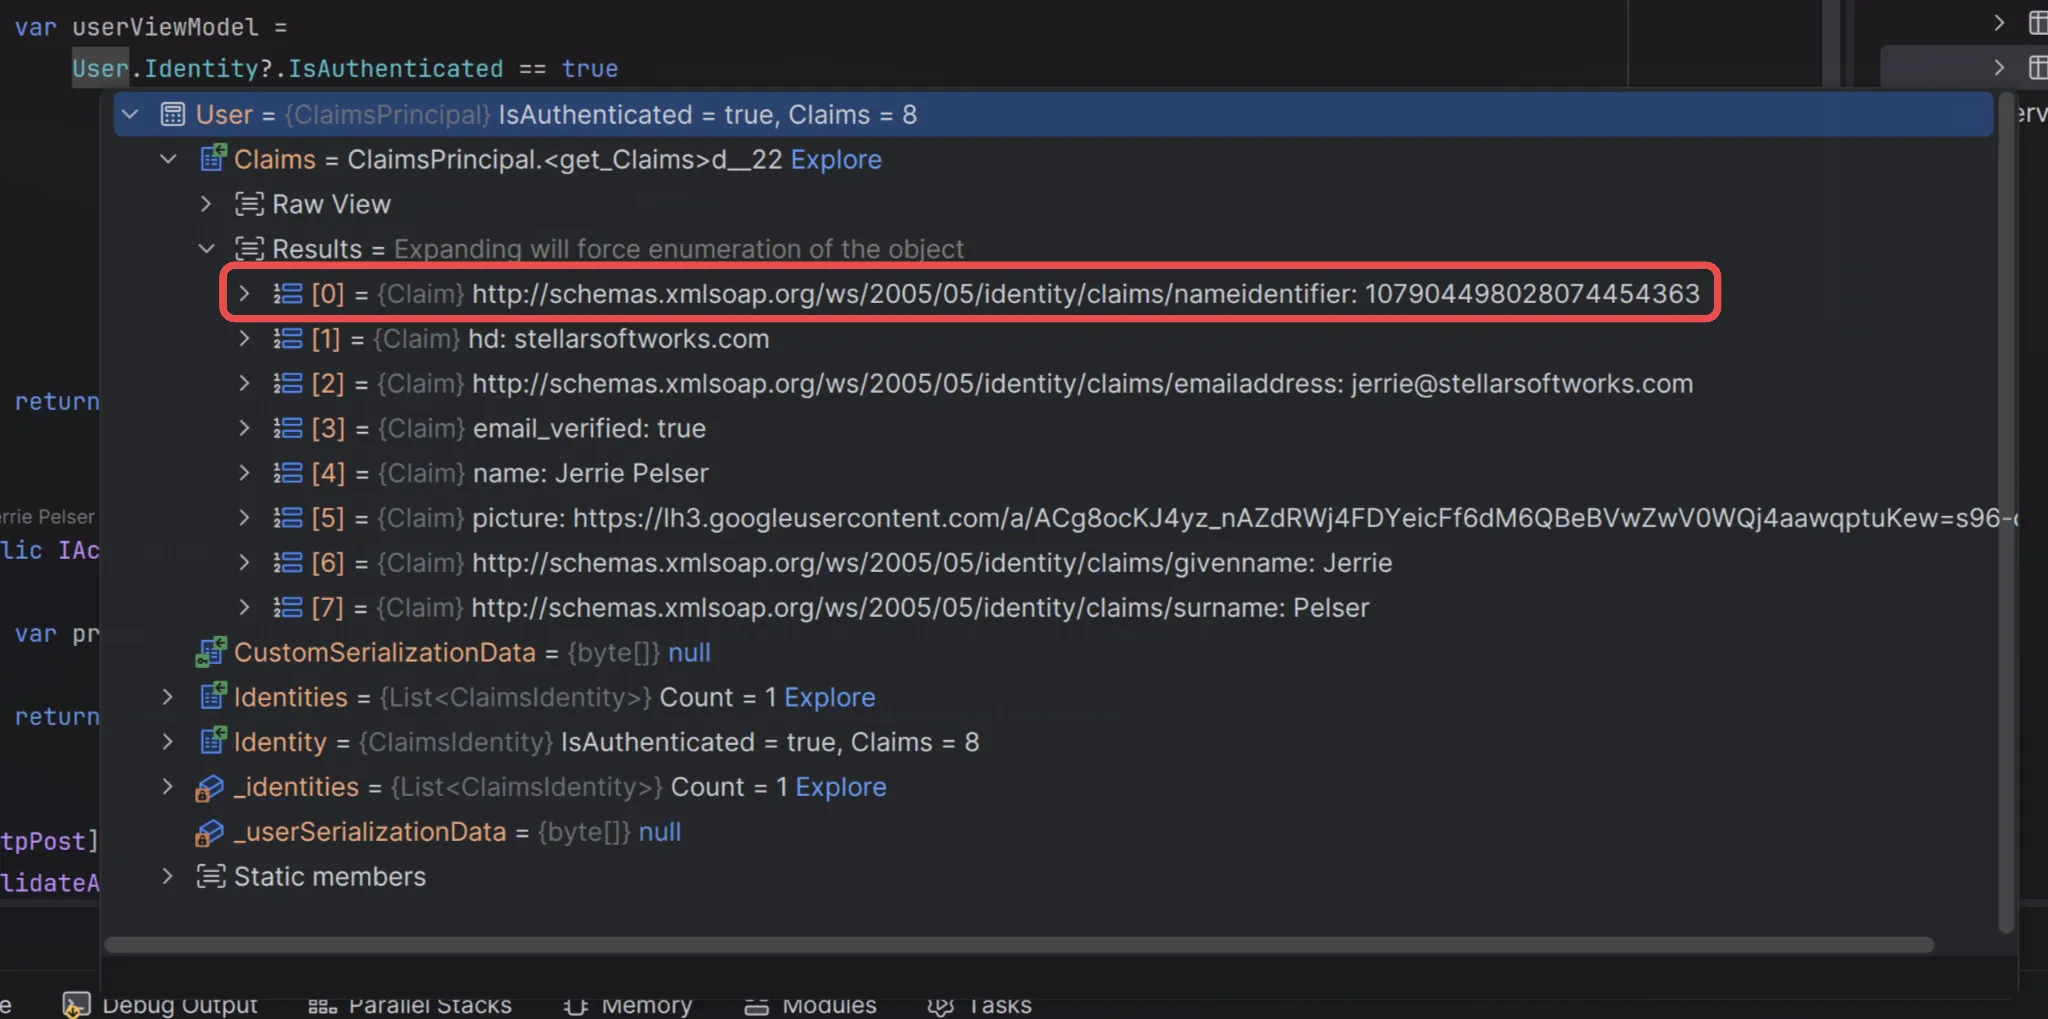
await dbContext.SaveChangesAsync(); }, }; });On the surface this looks correct, but there is still a big problem we can observe when running the user and inspecting the claims. Note that the NameIdentifier claim - which represents the users ID - is set to the value of the Google User ID.
Creating a new ClaimsPrincipal
What we need to do is to create a new ClaimsPrincipal and replace the Principal on the context parameter of our OnTicketReceived event.
builder .Services.AddAuthentication(options => { // ...some code omitted for brevity }) .AddCookie() .AddGoogleOpenIdConnect(options => { // ...some code omitted for brevity
options.Events = new OpenIdConnectEvents { OnTicketReceived = async context => { // ...some code omitted for brevity
await dbContext.SaveChangesAsync();
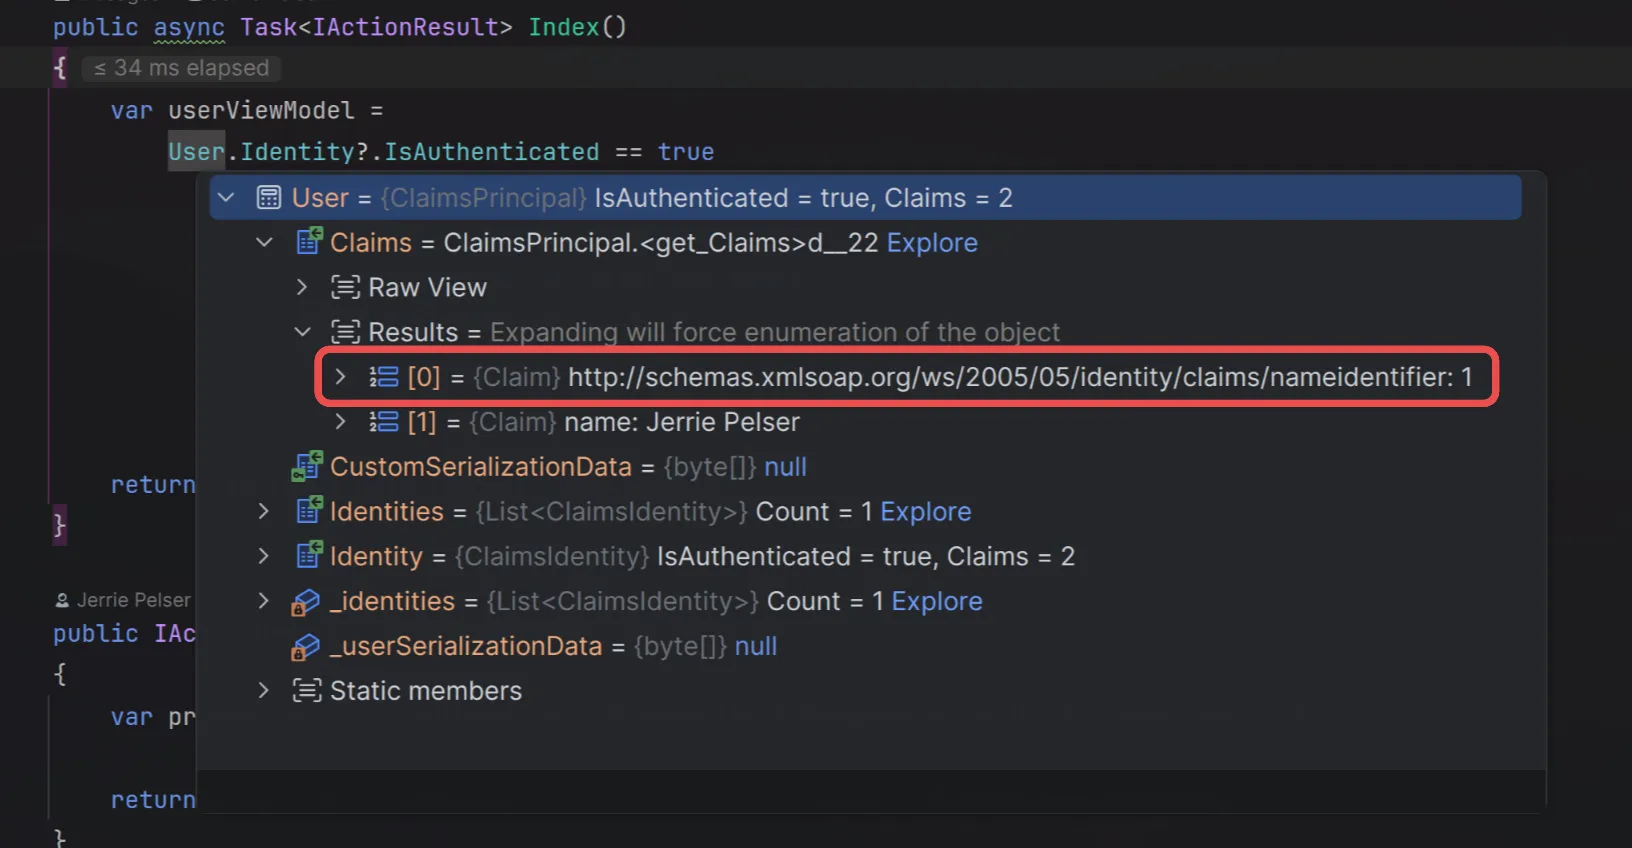
context.Principal = new ClaimsPrincipal( new ClaimsIdentity( [ new Claim(ClaimTypes.NameIdentifier, user.Id.ToString()), new Claim("name", user.Name), ], CookieAuthenticationDefaults.AuthenticationScheme ) ); }, }; });Running the application again, you can see we gave the correct claims.
Including the Google ClaimsIdentity in the new ClaimsPrincipal
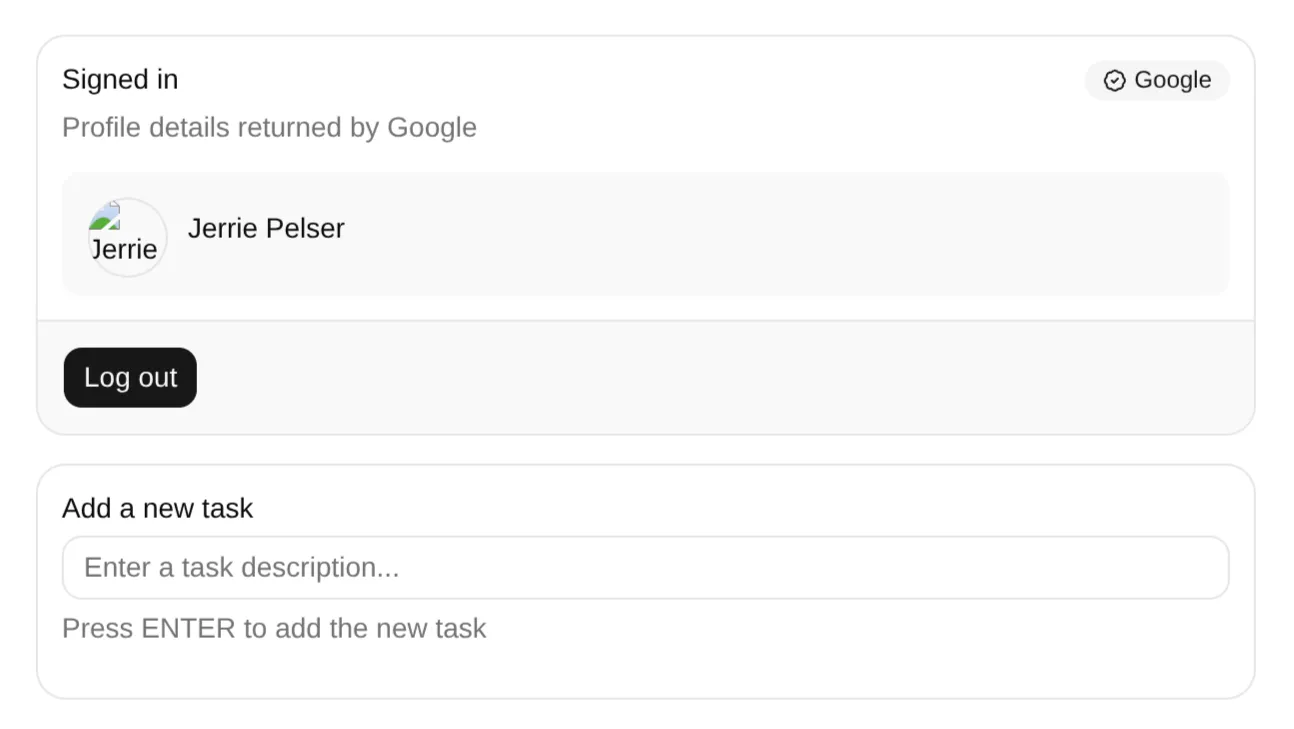
One side-effect of replacing the Principal with a new one in the way we did it, is that we now lose all the claims that were returned from Google. You can see this most clearly on the user information card which is now missing information such as the user’s photo and email address.
We can add those claims individually on the new ClaimsIdentity and that will work fine. However, another way to go about this is to still include the ClaimsIdentity created by the Google OIDC provider along with our newly created ClaimsIdentity.
I like this approach as it more accurately represents what is going on, namely that we have a ClaimsIdentity with claims that come from Google, as well as a ClaimsIdentity with claims that come from our local database.
In the example code below you can see an updated OnTicketReceived handler which includes the existing claims identities on the new ClaimsPrincipal.
builder .Services.AddAuthentication(options => { // ...some code omitted for brevity }) .AddCookie() .AddGoogleOpenIdConnect(options => { // ...some code omitted for brevity
options.Events = new OpenIdConnectEvents { OnTicketReceived = async context => { // ...some code omitted for brevity
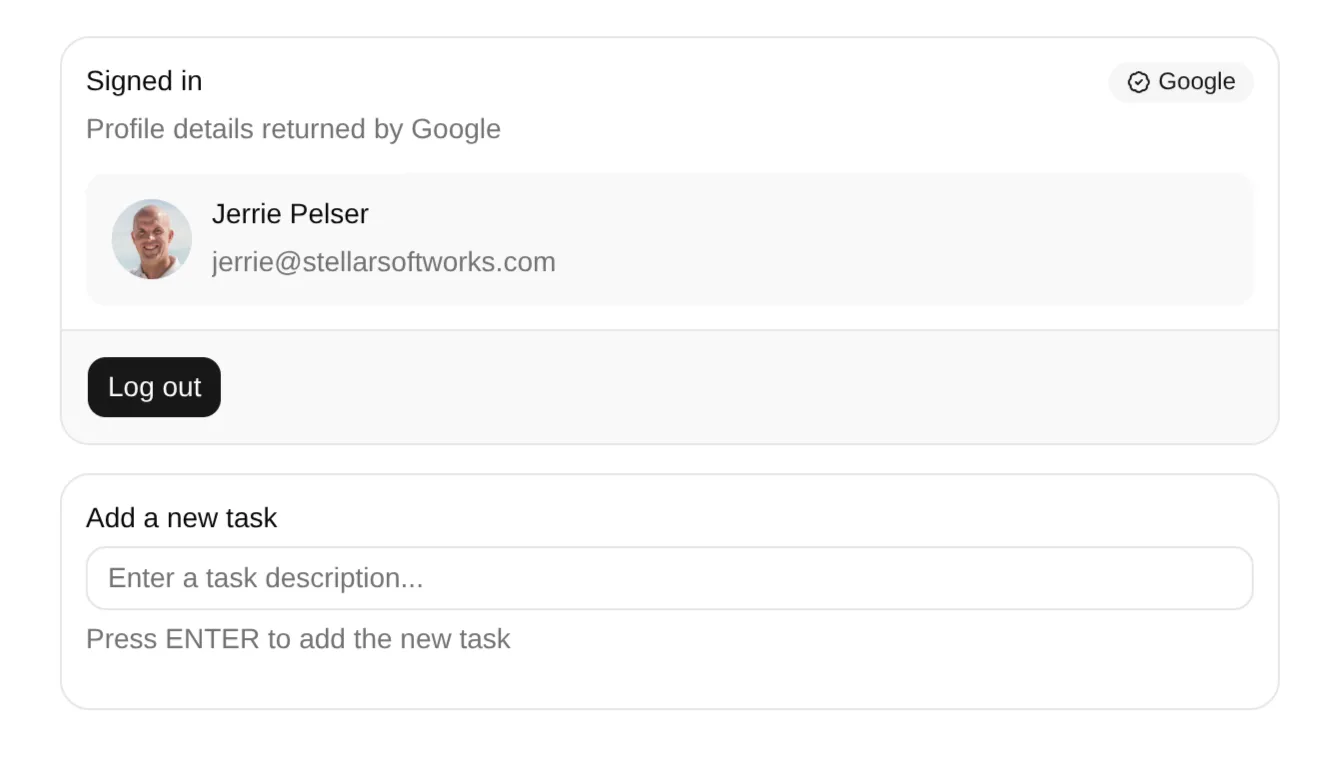
context.Principal = new ClaimsPrincipal([ new ClaimsIdentity( [ new Claim(ClaimTypes.NameIdentifier, user.Id.ToString()), new Claim("name", user.Name), ], CookieAuthenticationDefaults.AuthenticationScheme ), .. context.Principal!.Identities, ]); }, }; });With this in place, all the user information is available again.
Be careful when reading claims
One thing you must be careful about when taking the approach above is the you will end up with duplicate claims. As you can see in the screenshot below, we now have two NameIdentifier claims - one from the local user and one from Google.
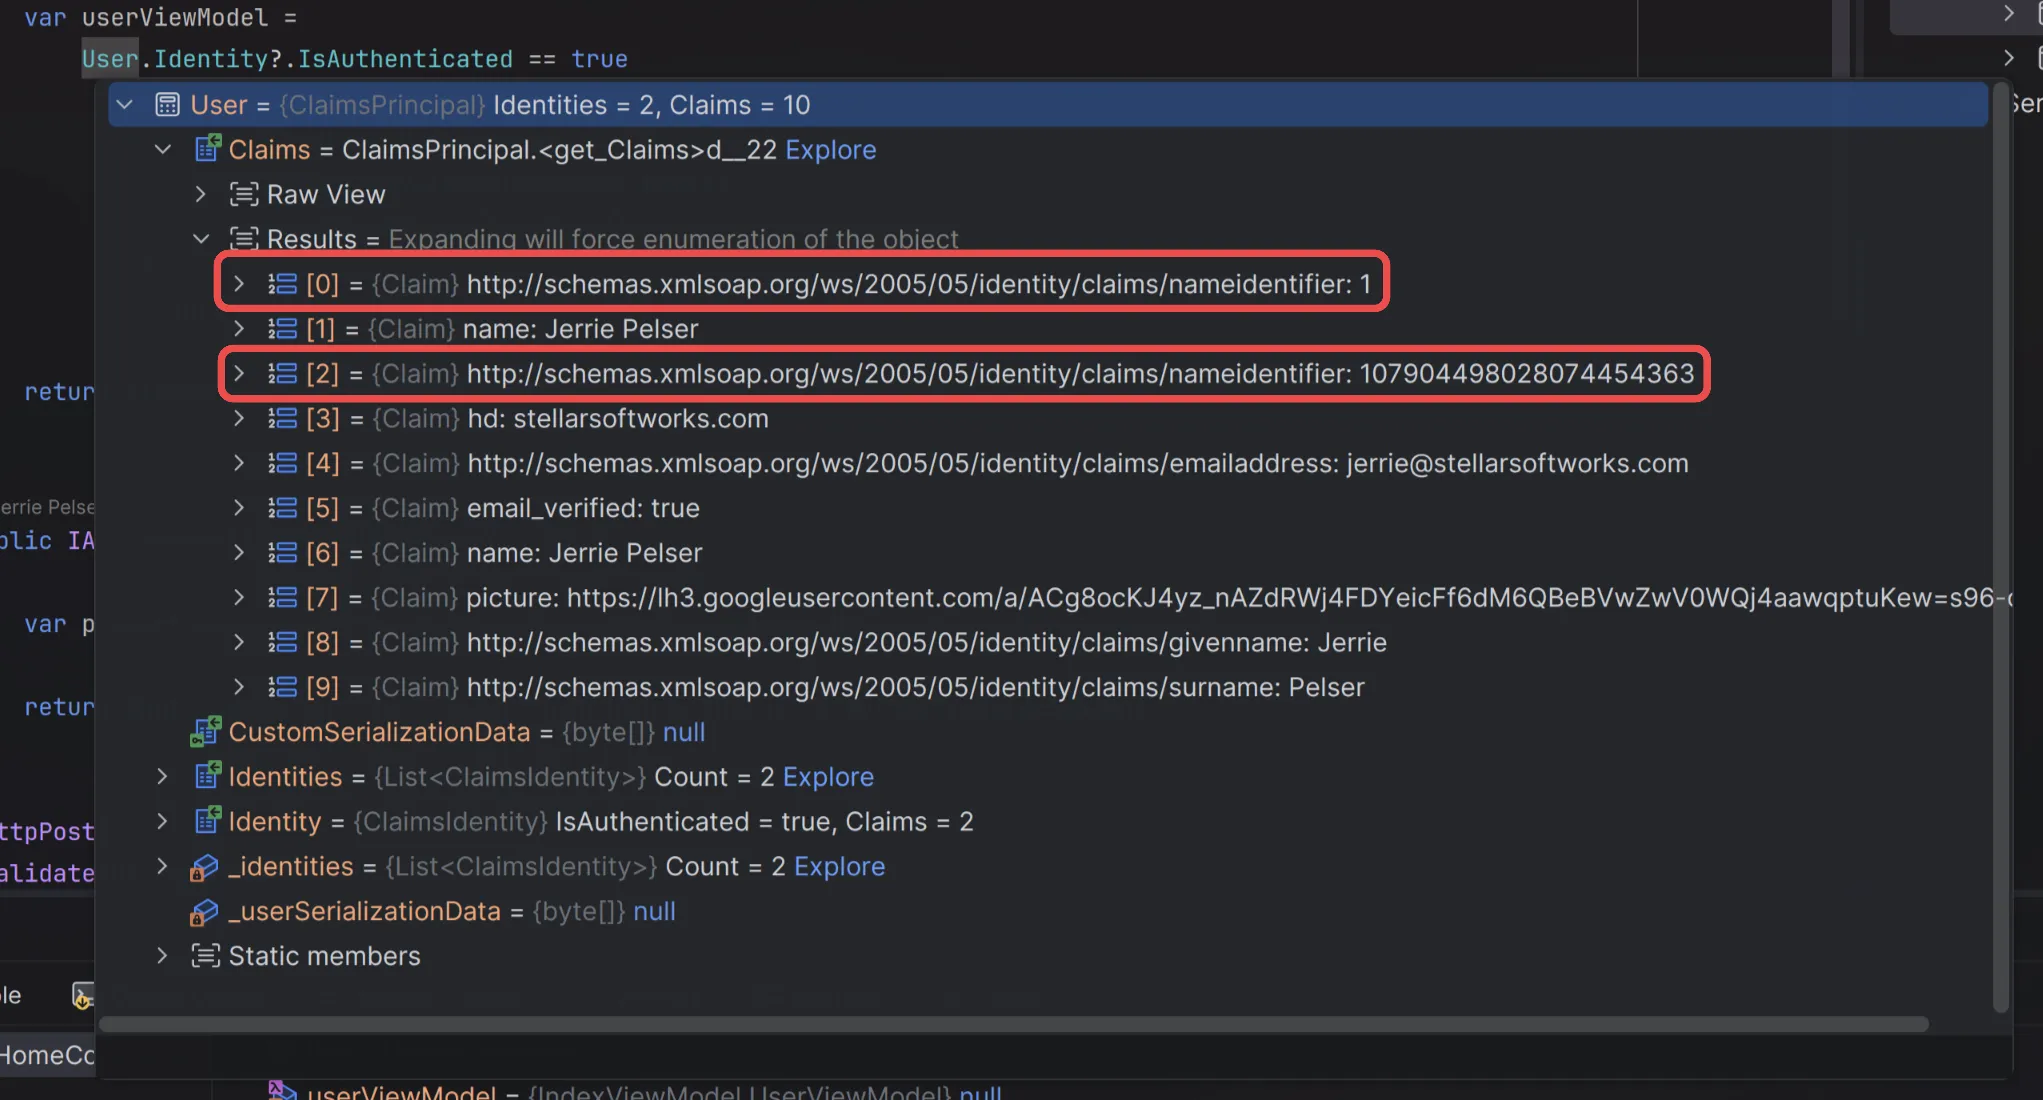
Since we added the new ClaimsIdentity before the existing ones, we can depend on the order and know that when we do a User.FindFirst(ClaimTypes.NameIdentifier), we will return the local user’s ID. However, this is a bit flaky - especially considering that we use the value of that claim to get the user’s ID so we can store it in the database for tasks we create.
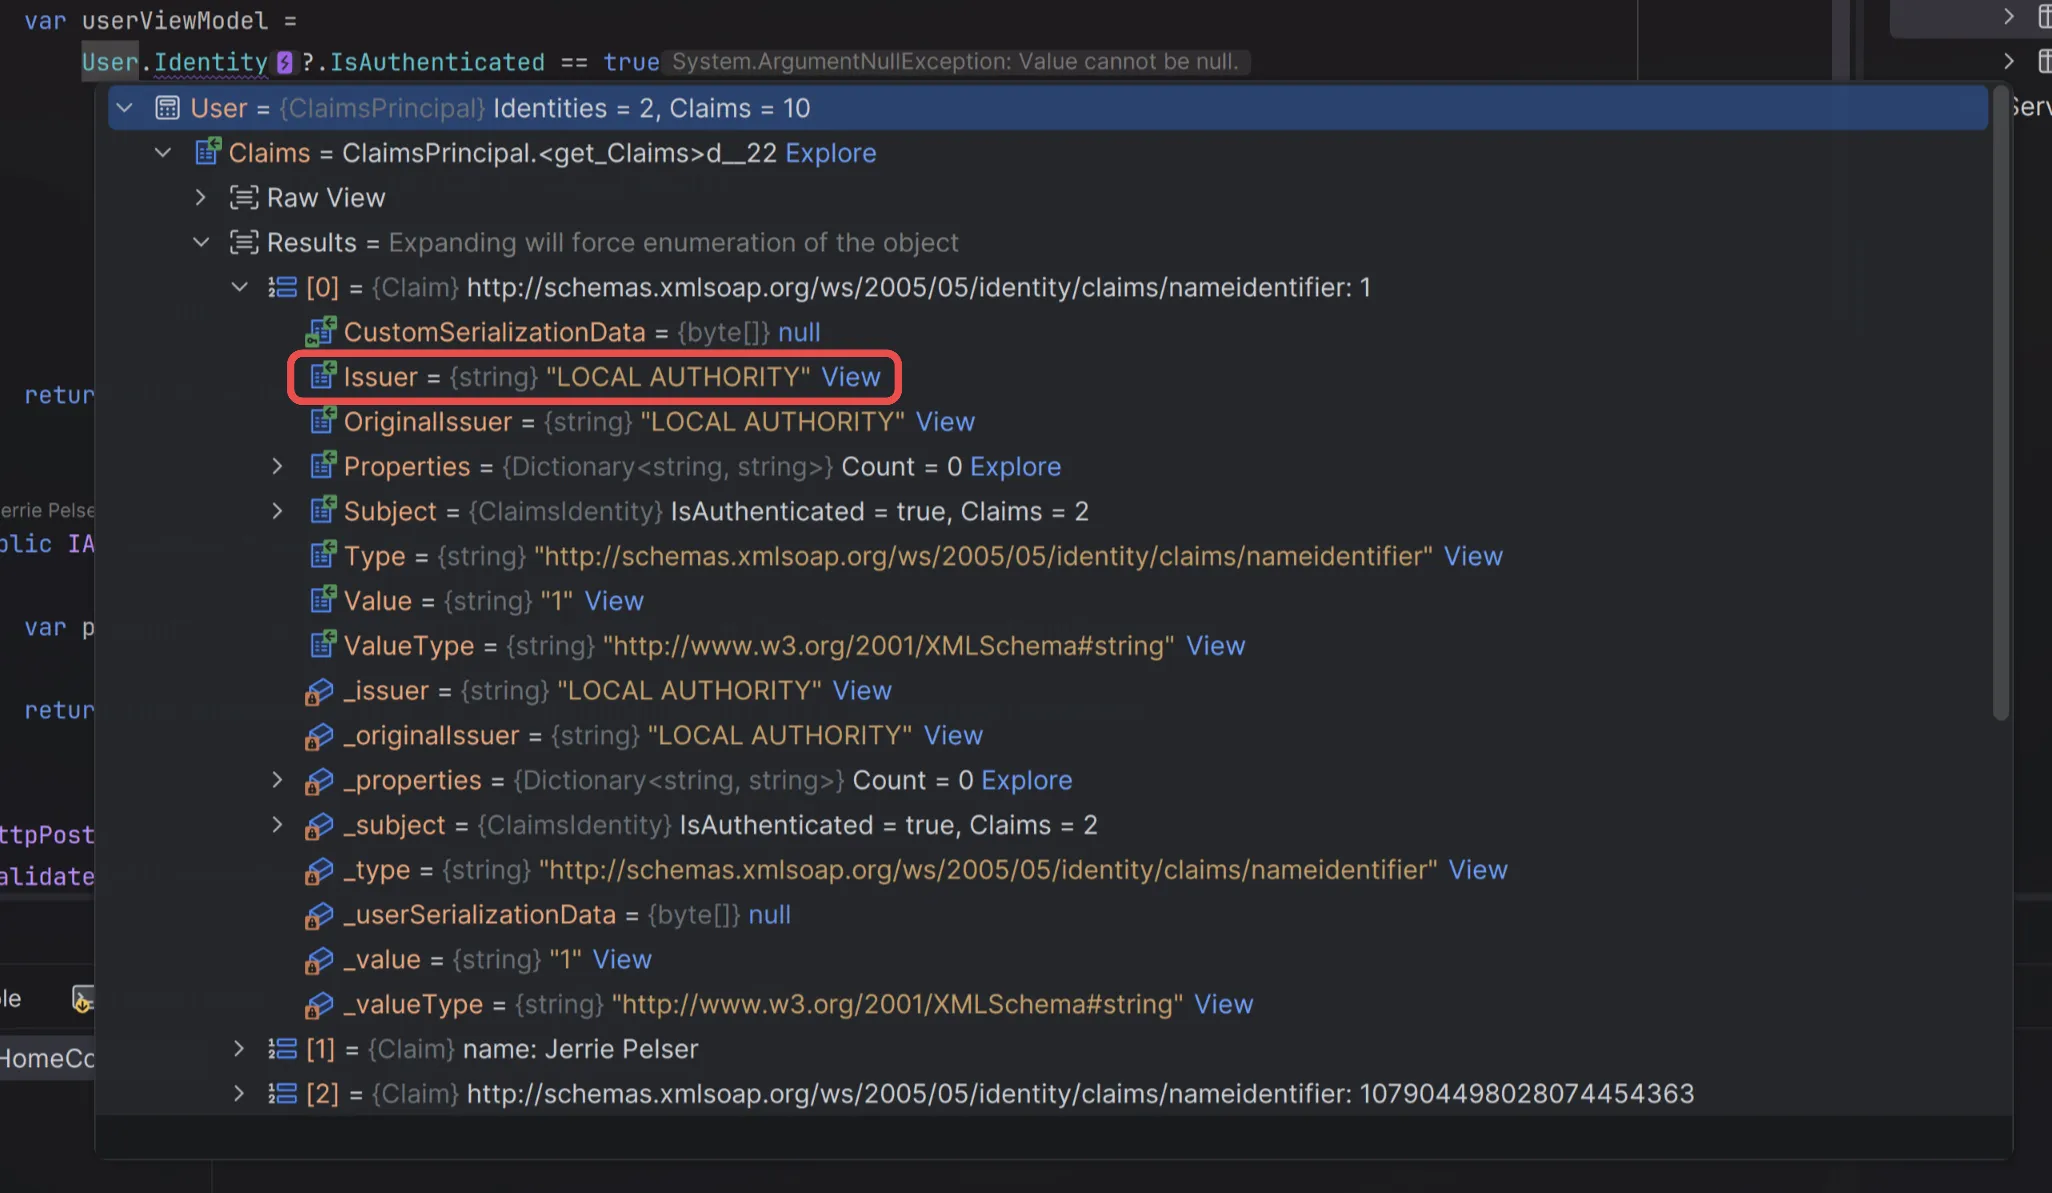
If we look closer at the claims coming from the ClaimsIdentity we created for the local user, you will notice that the Issuer is set to LOCAL AUTHORITY.
On the other hand, the claim coming from Google has an Issuer of https://accounts.google.com.
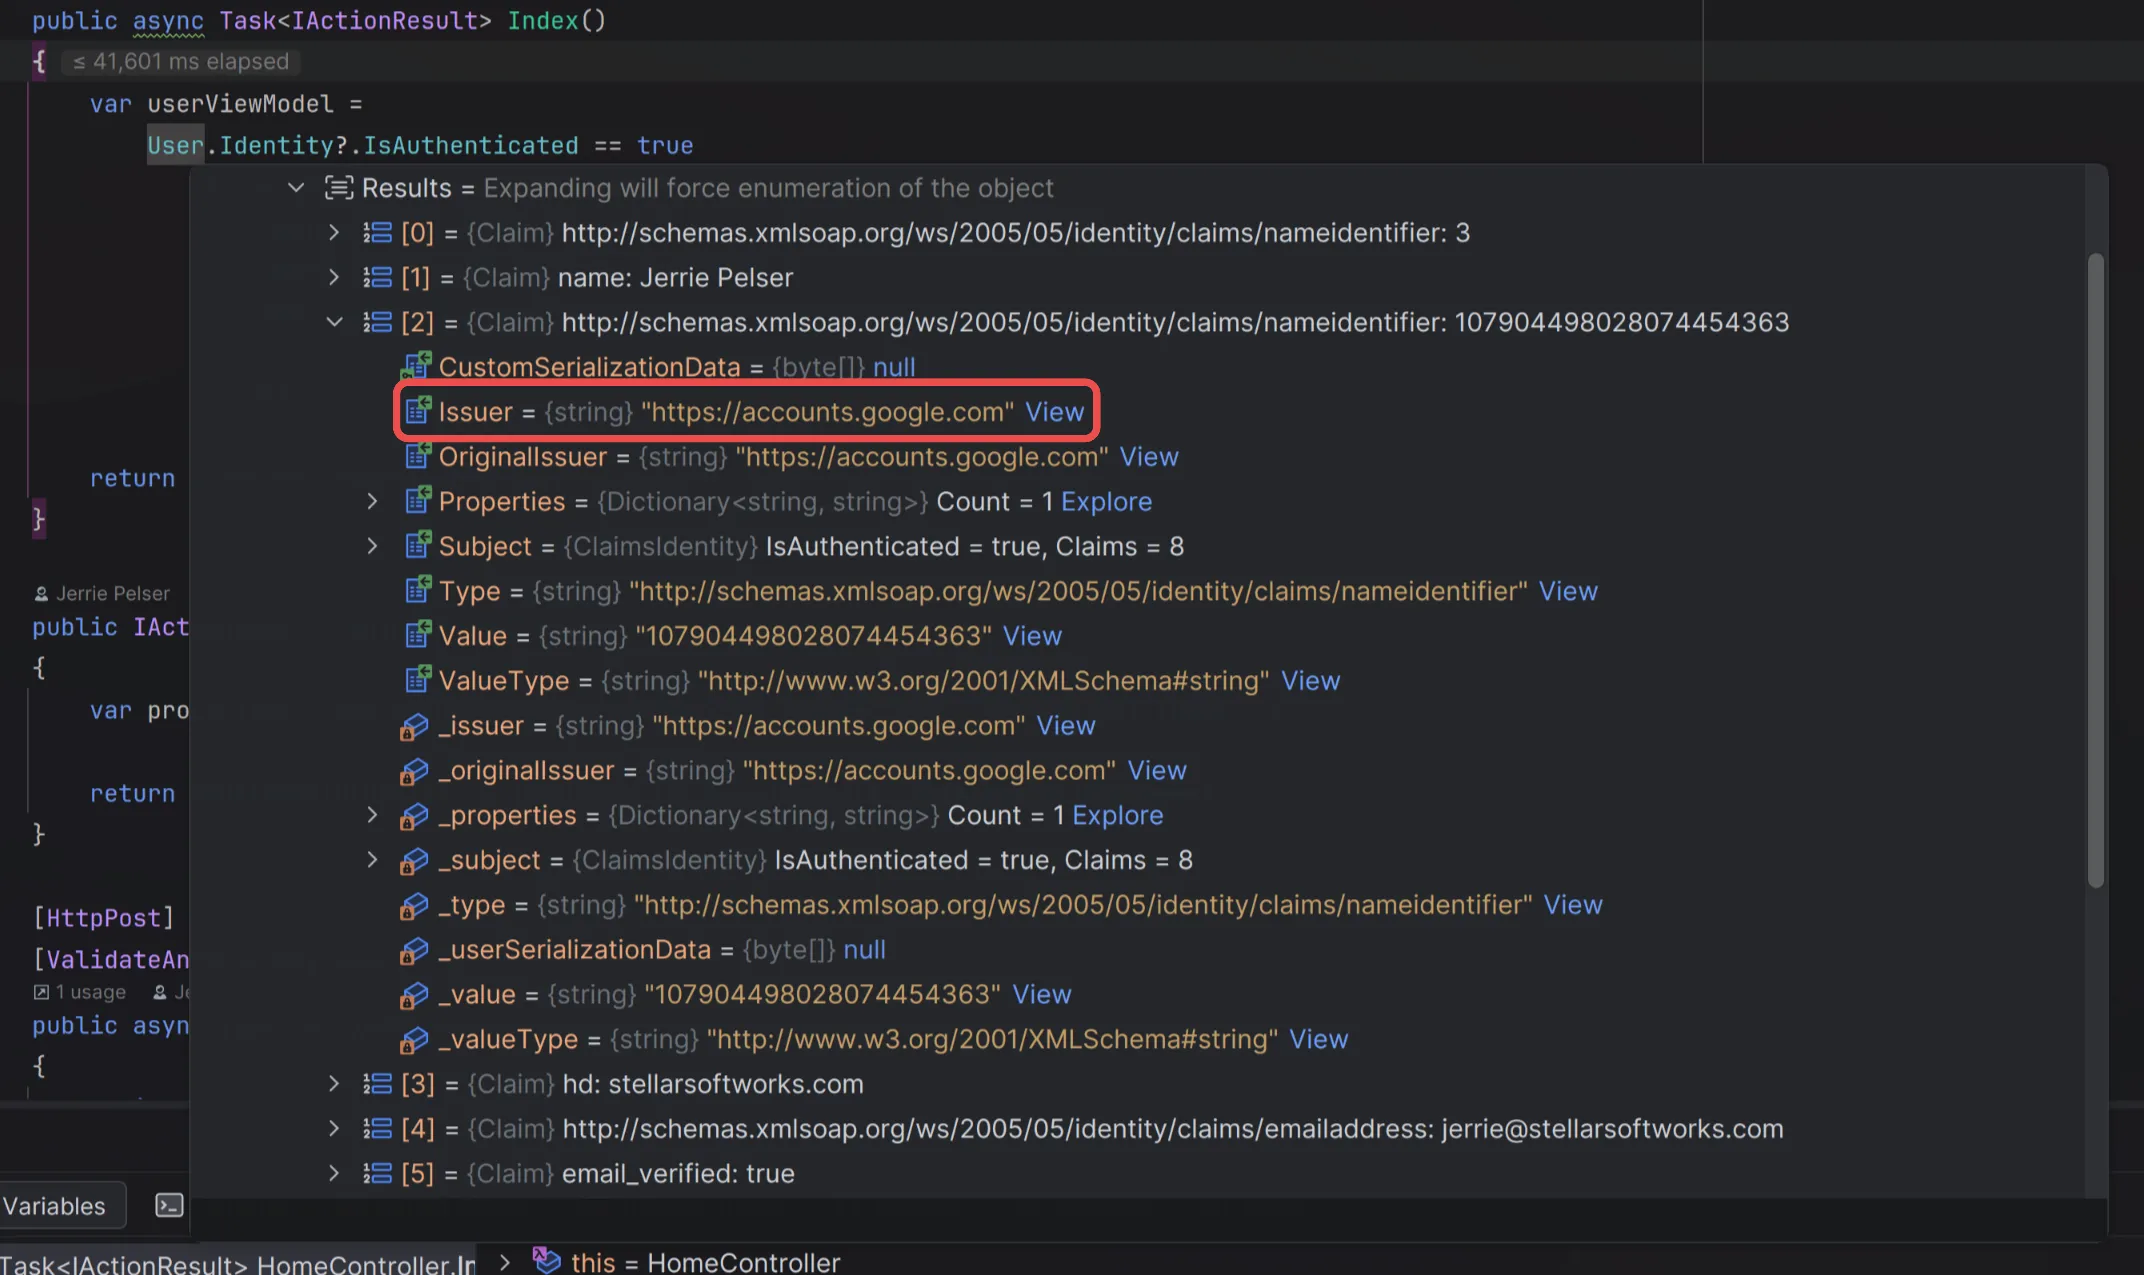
We can use this to our advantage and write a GetUserId() extension method that will find the NameIdentifier claim where the issuer is the LOCAL AUTHORITY and convert that to an integer.
public static class ClaimsPrincipalExtensions{ extension(ClaimsPrincipal principal) { public int GetUserId() { if ( principal.Claims.FirstOrDefault(c => c is { Type: ClaimTypes.NameIdentifier, Issuer: "LOCAL AUTHORITY" } ) is { Value: { } nameIdentifierValue } && int.TryParse(nameIdentifierValue, out var userId) ) { return userId; }
throw new Exception("Unable to find user ID"); } }}Then, whenever we want to get the current user’s ID, we can simply call User.GetUserId().
Conclusion
In this blog post I demonstrated how to use a custom primary key when creating a local user from a user’s Google login. We also looked at how to override the Principal returned from the Google authentication flow to add claims from the local user, along with the claims coming from Google.
You can find the example code available at https://github.com/jerriepelser-blog/google-authentication/tree/master/create-user-record.